Enable Analytics on the Application
Analytics formerly required a separate agent that was bundled with Machine Agent. However, Analytics is now agentless and embedded in the APM Agent for both .NET Agent >= 20.10 and Java Agent >= 4.5.15 on Controllers >= 4.5.16
In this exercise you will access your AppDynamics Controller from your web browser and enable the Agentless Analytics from there.
Login to your controller
Use the URL below to login to your controller from your web browser.
http://[controller-vm-ip-address]:8090
Navigate to the Analytics Configuration
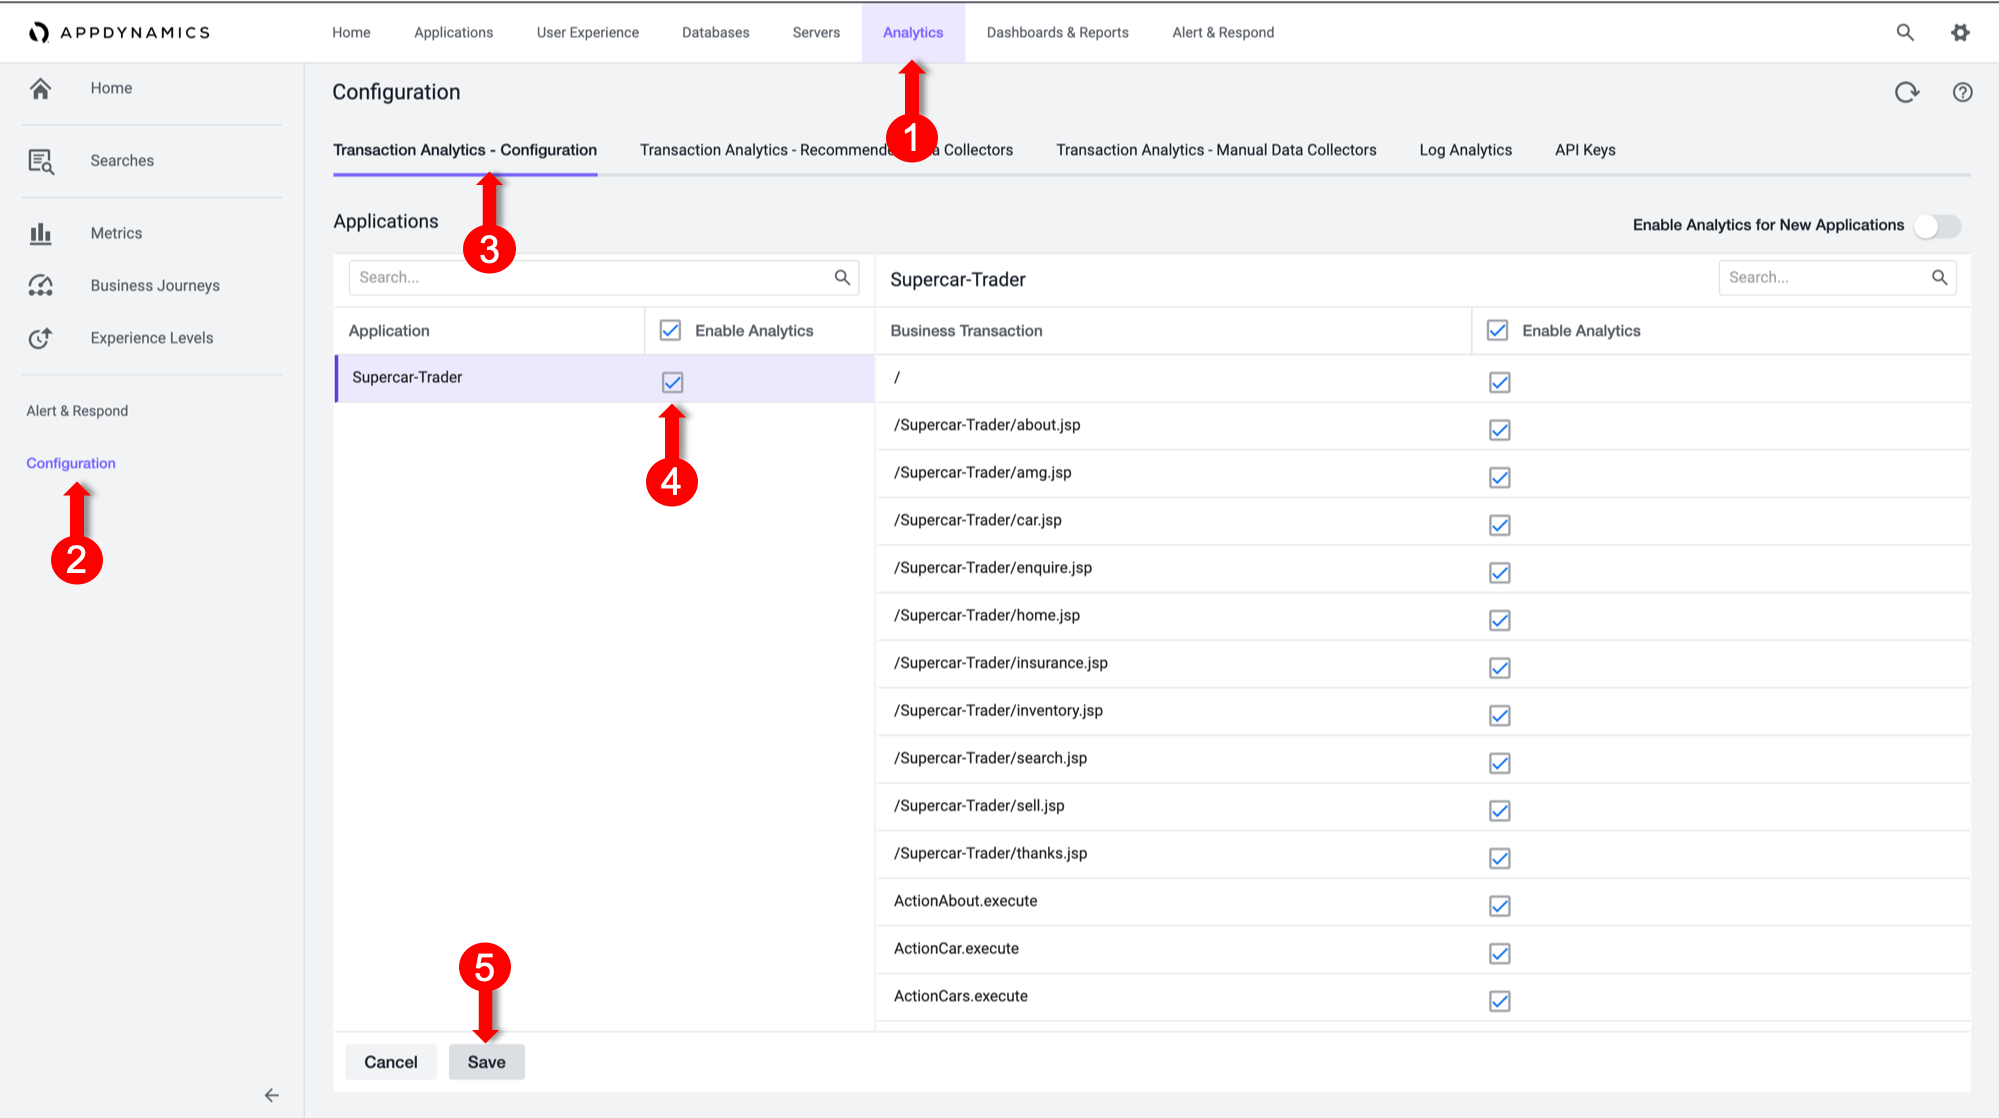
1 . Select the Analytics tab at the top left of the screen.
2 . Select the Configuration Left tab.
3 . Select the Transaction Analytics - Configuration tab.
4 . Mark the Checkbox next to the SuperCars Application
5 . Click the Save button
Validate the Events Service URL
You want to ensure it is set correctly and accessible by the Agentless Analytics.
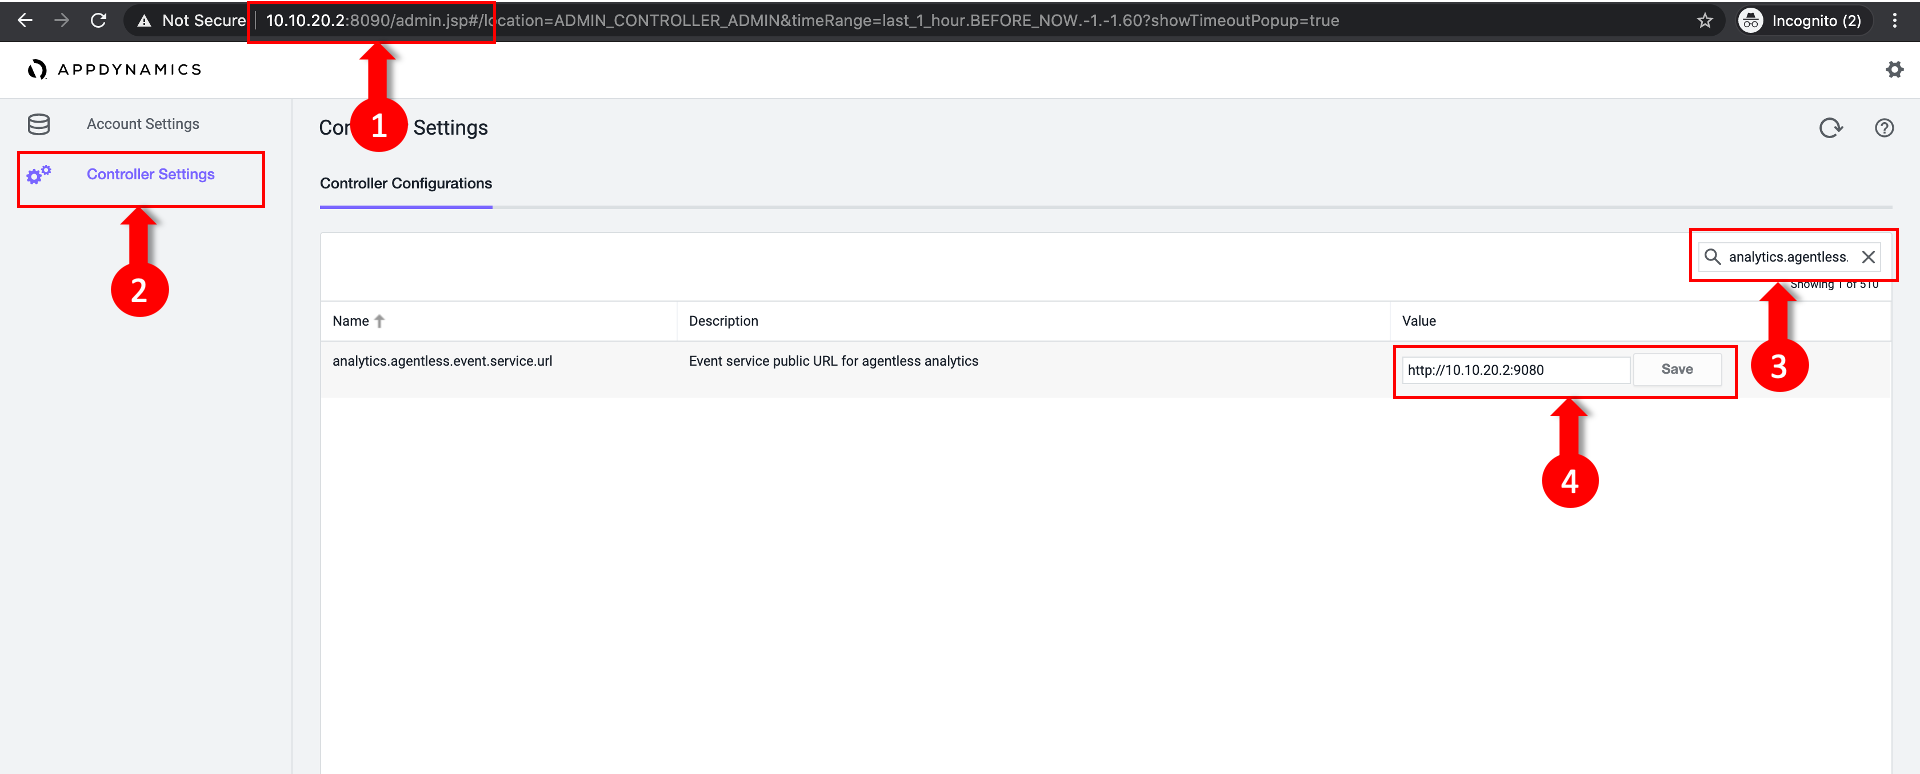
1 . Log in to the administration console at http://[controller-vm-ip-address]:8090/controller/admin.jsp and use the Password: welcome1
2 . Select the Controller Settings from the Left tab.
3 . Search for analytics.agentless.event.service.url property.
4 . Insert your Events Service Endpoint. Since we are deploying the Events service on the same Controller VM, we will use the Controller IP and the Events Service Port 9080, which will be http://[controller-vm-ip-address]:9080
Apply any manual load on the application
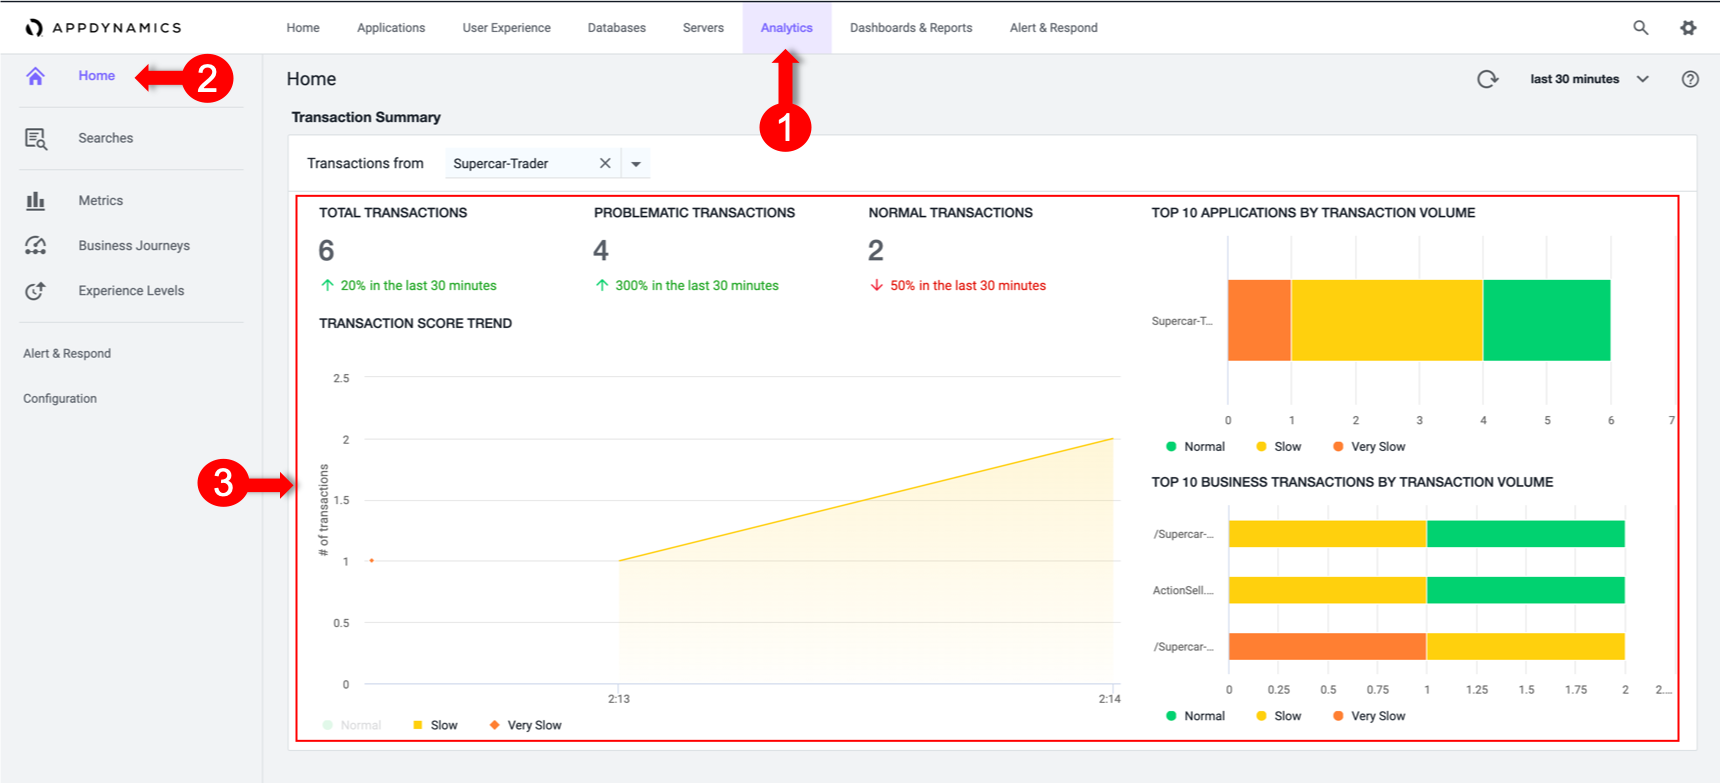
You want to verify that Analytics is working for that application and showing transactions.
- Select the Analytics tab at the top left of the screen.
- Select the Home Left tab.
- Wait for couple of minutes, and Validate that there is Analytics Data
Next
We’ll configure the HTTP data collectors.