Platform Installation
AppDynamics Platform Installation Guide (LINUX)
Overview
If you already have an NFR License for an existing SaaS or On-Prem Controller, you may use that Controller for this exercise instead of deploying a new on-prem Controller.
This lab guides you through the process of installing and configuring the AppDynamics platform components for an on-premise deployment. The architecture diagram below shows these components with their communication paths and payloads.
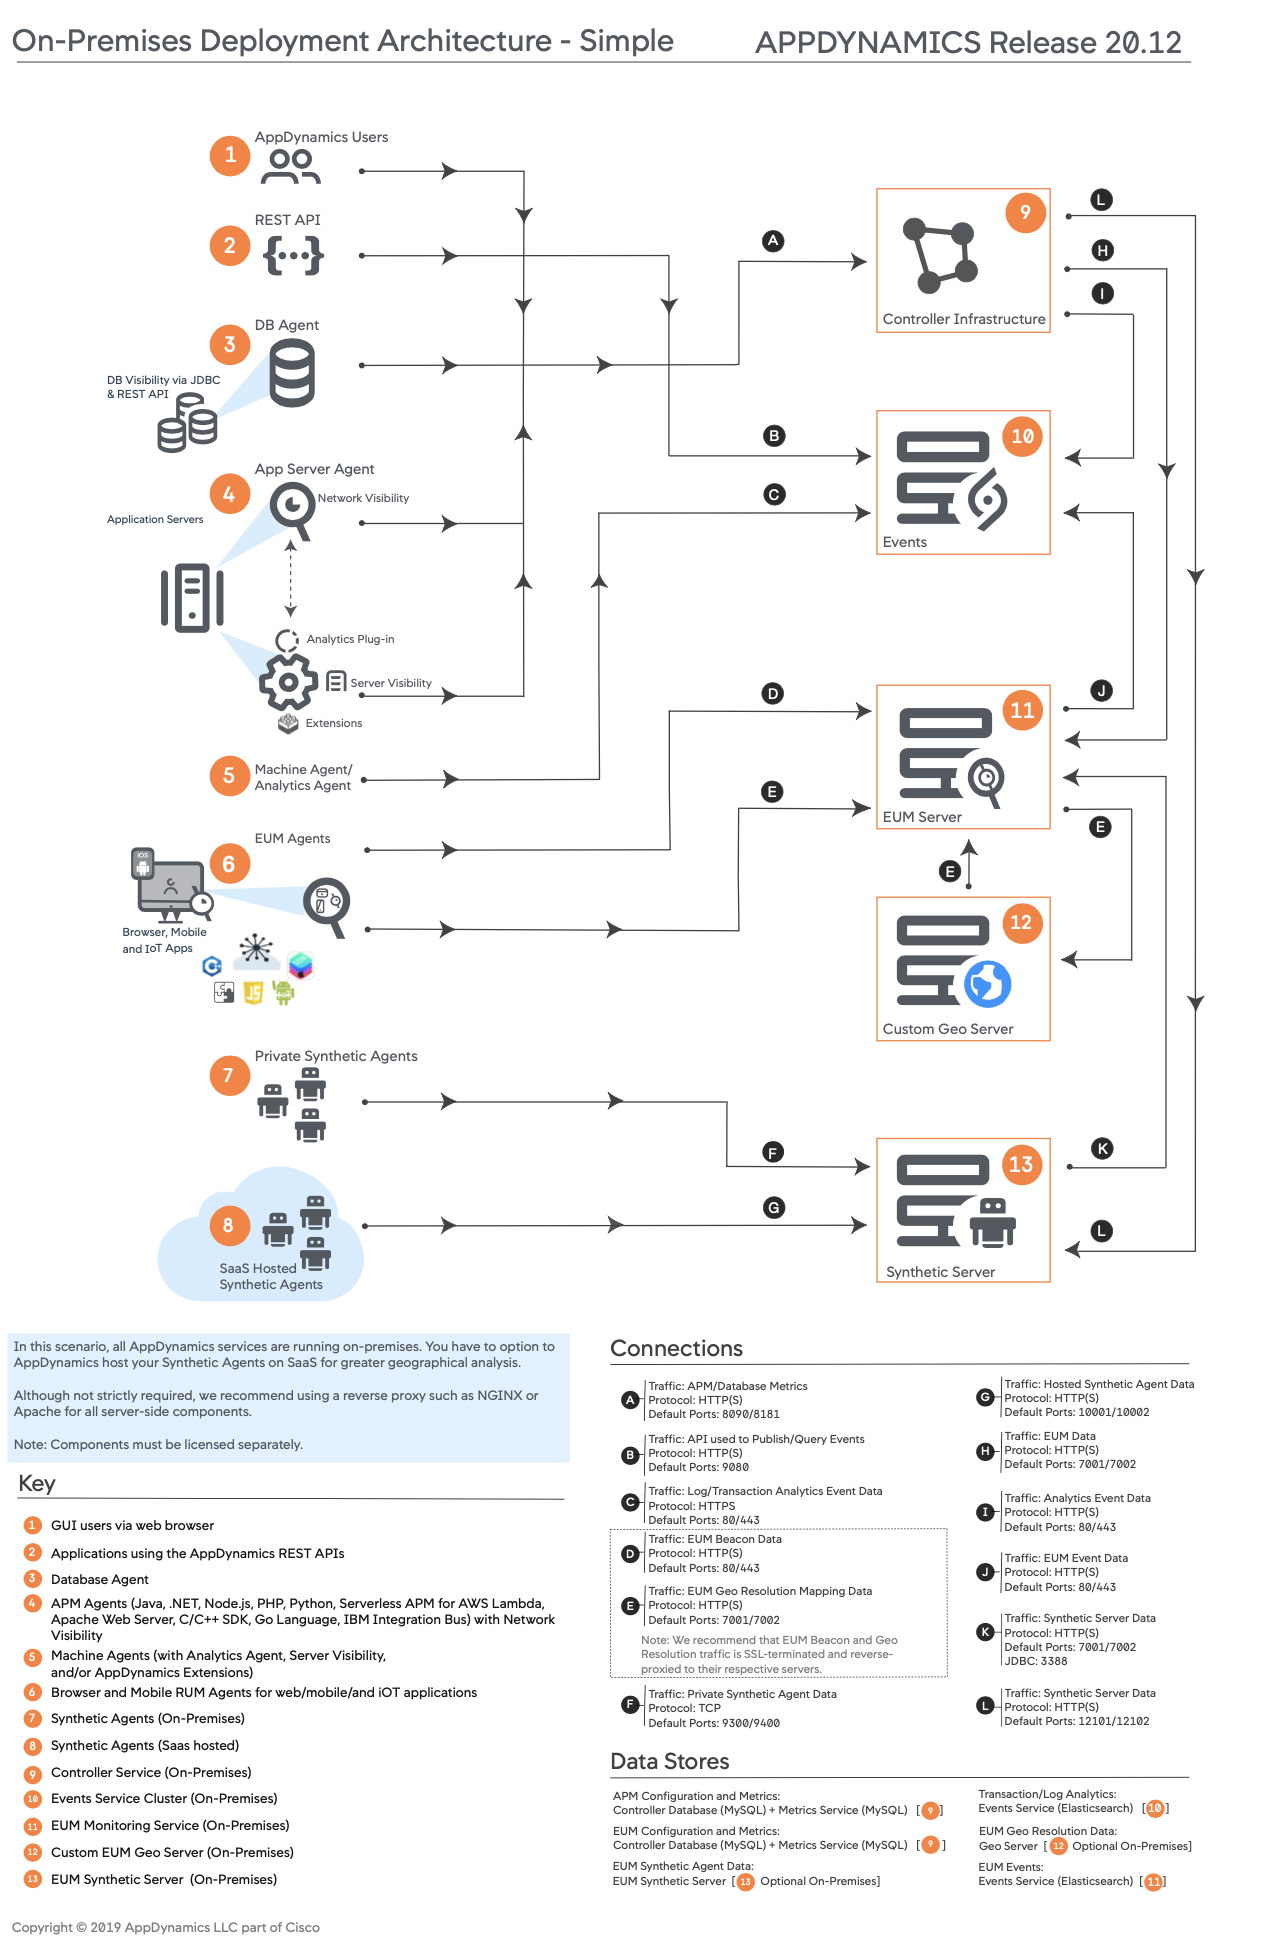
In this Lab for simplicity we will install all AppDynamics Components (Enterprise Console, Controller, Events Service, End User Monitoring Server) on a Standalone Virtual Machine.
In this Lab, you will learn to:
Install the Enterprise Console (aka Platform Admin) tool
Install and configure the AppDynamics Controller software
Install and configure the Events Service
Install and configure the End User Monitoring (EUM) Server
The software versions used in the lab are the most recent generally available at the time the lab was created. As subsequent versions continue to be released, expect slight variations to command line output and screen shot graphics. Though normally inconsequential, it is recommended to note these differences for reference in troubleshooting should they become significant.
Setup
Step 1: Preparing the Virtual Machine Specs
- Operating System: Linux (This Guide is based on Linux OS)
Linux Distribution: Any from the below list (This Guide is based on CentOS7)
- CentOS 7
- Amazon Linux 2 (AL2)
CPU: 4 Cores (Minimum)
Memory: 16 GB RAM (Minimum), 32 GB RAM (Recommended)
Storage: 100 GB (Minimum)
Reference: Controller Sizing Requirements
Step 2: Enterprise Console Requirements
The Enterprise Console can run on the same host as the Controller and the embedded Events Service. If this is the case, the machine you choose to run the Enterprise Console must meet the requirements for all the components that run on that machine.
Reference documentation can be found on the AppDynamics documents site - Enterprise Console Requirements.
1 . You will need to install these required libraries
yum install libaio

yum install numactl

yum install tzdata

yum install ncurses-libs
Note: the above required libraries are based on AL2 and CentOS 7, if you need more detail, please refer to Enterprise Console Requirements - Required Libraries.
2 . AppDynamics requires the following hard and soft per-user limits in Linux:
- Open file descriptor limit (nofile): 65535
- Process limit (nproc): 65535
Following the steps in Configure User Limits in Linux Controllers:
And add the following at the end of the file:
* hard nofile 65535
* soft nofile 65535
* hard nproc 65535
* soft nproc 65535
Then logout from the terminal and login again.
Step 3: Install Enterprise Console (aka Platform Admin)
In this exercise, you will be setting up the Enterprise Console. This utility provides a browser-based user interface that allows an AppDynamics administrator to install and manage the Controller and Events Service components of the AppDynamics platform. A CLI for the Enterprise Console is available, but is outside the scope of this lab.
Reference documentation can be found on the AppDynamics documents site - Enterprise Console Documentation.
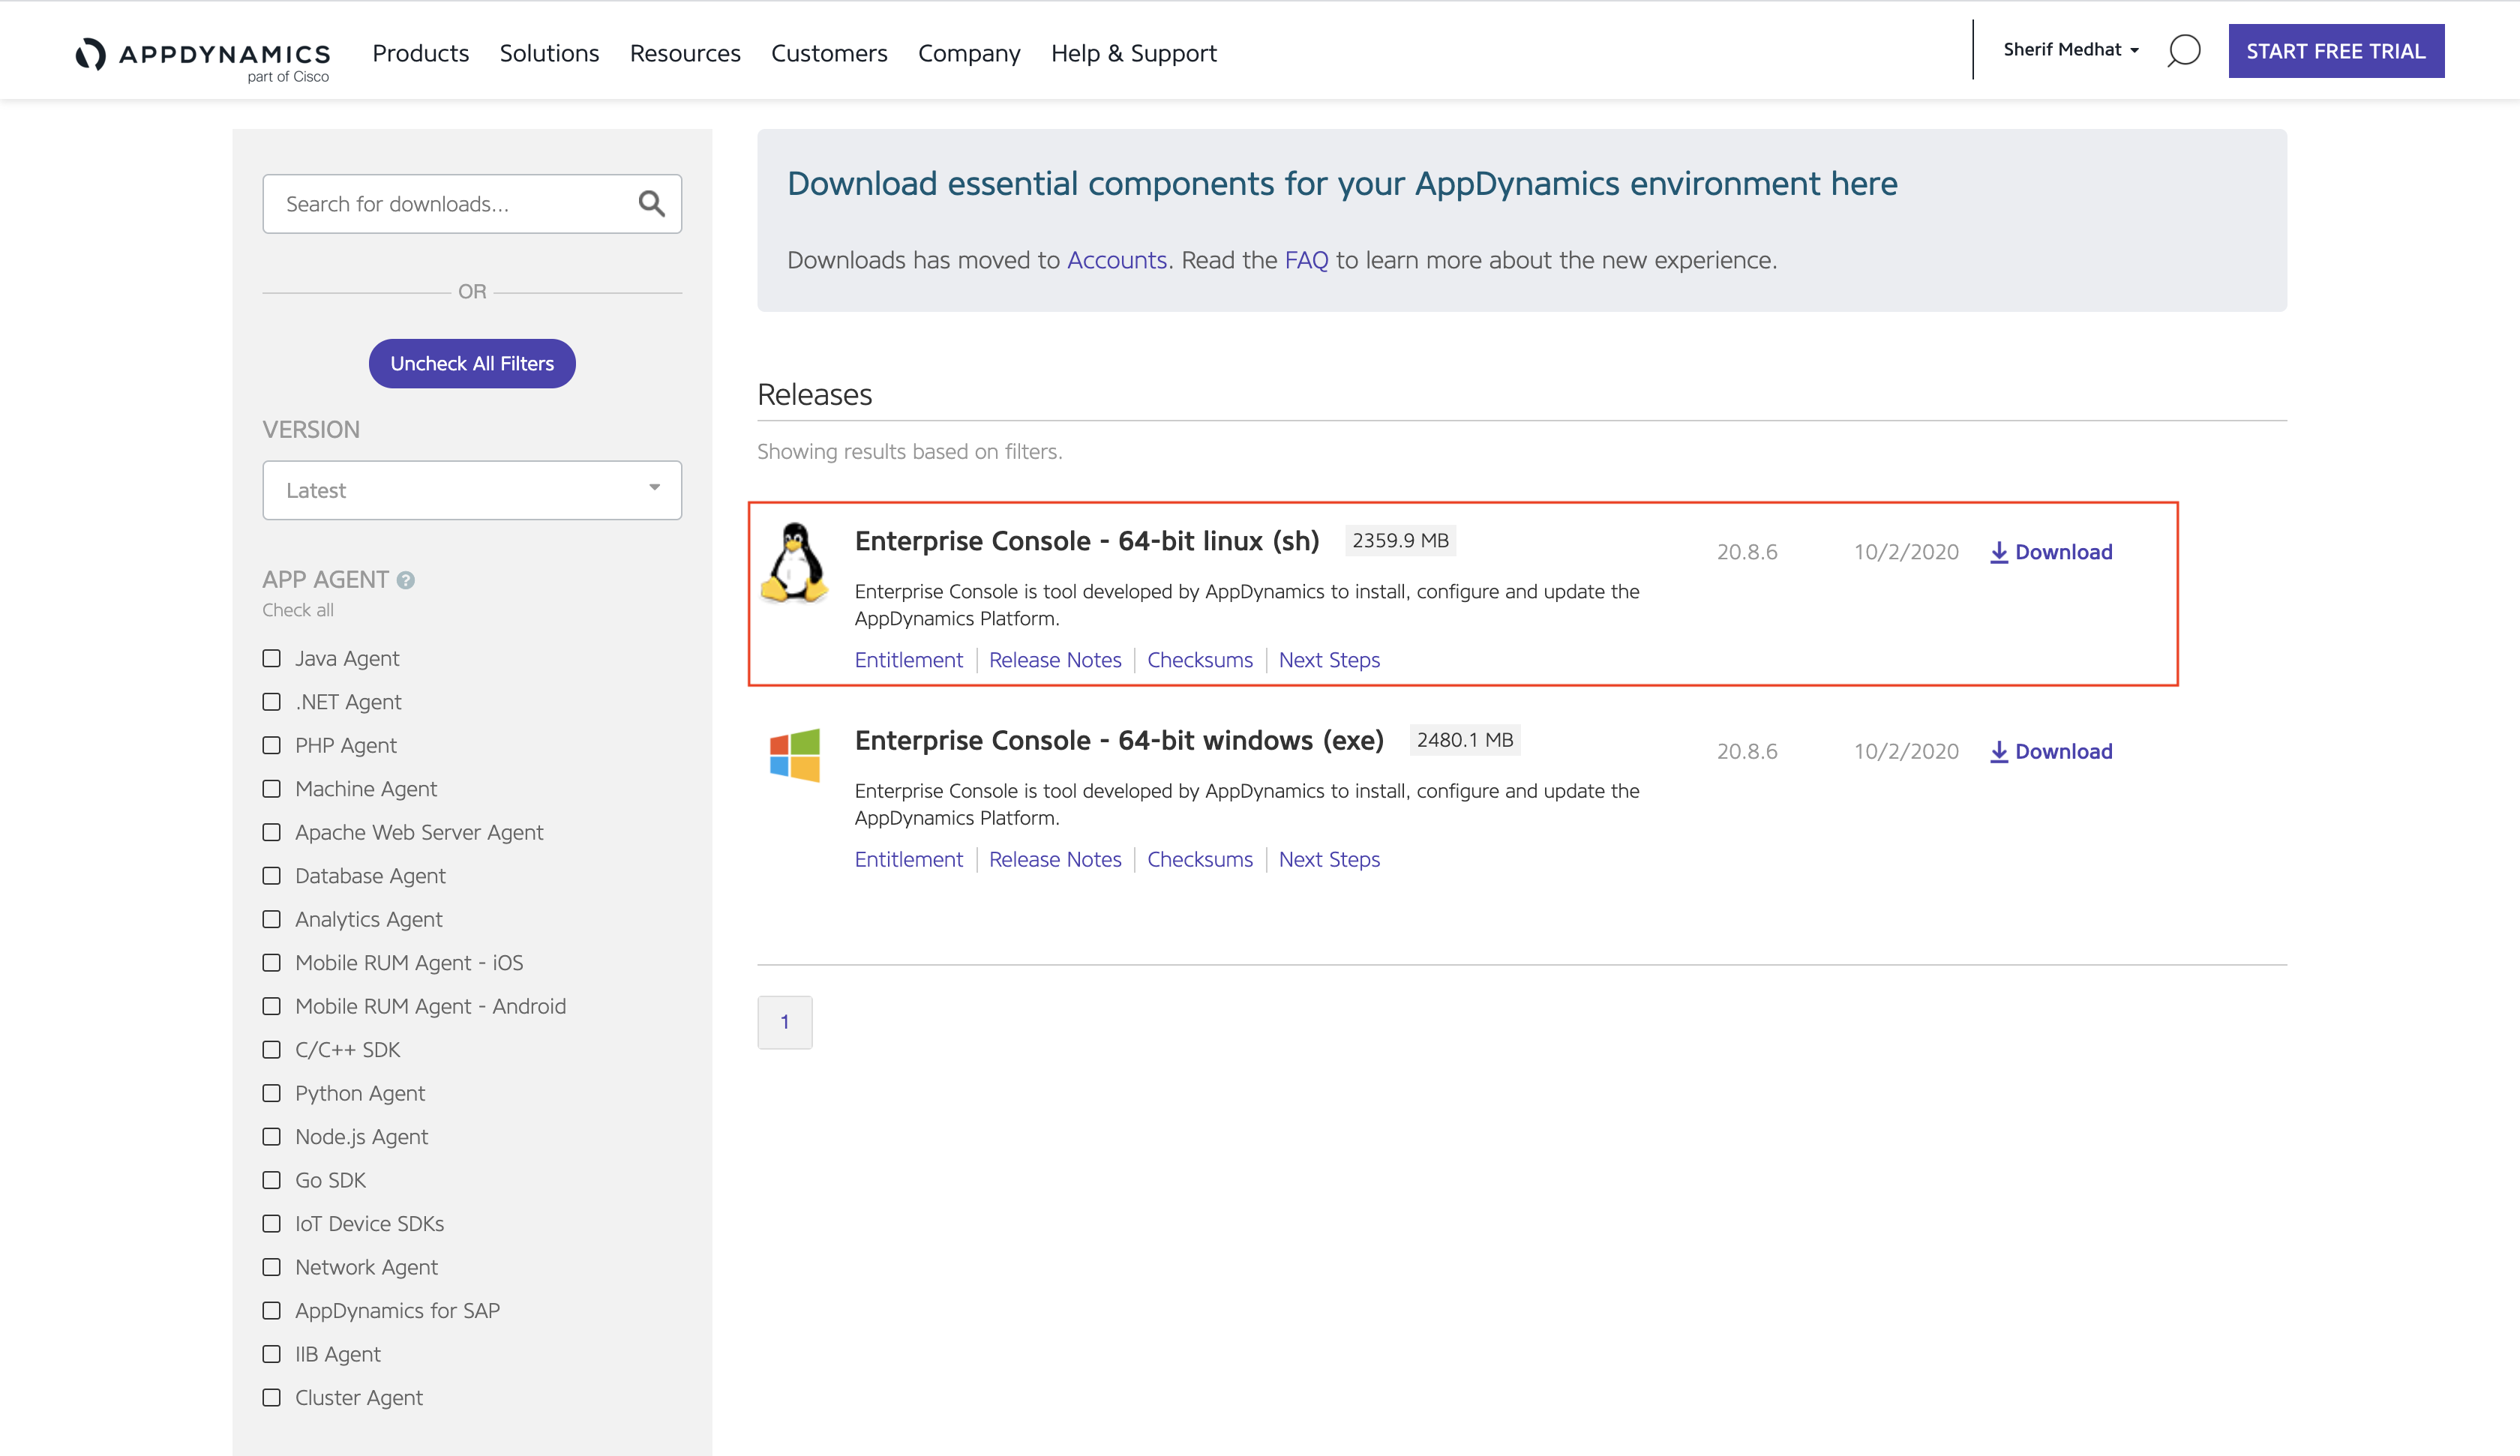
1 . Download and copy the Platform Admin Installer Script to the lab host. Log into / Register on https://accounts.appdynamics.com to download the “Enterprise Console - 64-bit Linux(sh)”.
Note: If you do not have access to the download binary using the instructions above, please use the download links provided in the PDF associated with this section of the course on Black Belt.
2 . Copy the .sh file to your Host either using SCP on if your Desktop is MAC/Linux or using WinSCP if your Desktop is Windows
3 . On the Host, Make the installer script executable:
chmod a+x platform-setup-x64-linux-20.x.x.x.sh 4 . Install the Platform Admin software:
sudo su

./platform-setup-x64-linux-20.x.x.x.sh
With inputing the below
I accept the agreement: 1
Where should AppDynamics Enterprise Console be installed?: /opt/appdynamics/platform
Database Root User Password: AppD123
Database Port: 3377 (default)
Enterprise Console Database Password: AppD123
Enable Https Connection: n
Enterprise Console Host Name: In case of AWS, Enter the public DNS name of the lab EC2 instance
Enterprise Console Port: 9191 (default)
Enterprise Console Root User Name: admin (default)
Enterprise Console Root User Password: AppD123
After a few minutes, you should see output similar to that shown below…
Setup has finished installing AppDynamics Enterprise Console on your computer.
To install and manage your AppDynamics Platform, use the Enterprise Console
CLI from /opt/appdynamics/platform/platform-admin/bin directory.
Finishing installation ...
5 . To confirm the Enterprise Console is functioning properly, verify you can connect to its URL in a web browser and authenticate using the information specified in the installation (Username: admin, Password: AppD123).
http://[your-ip-address]:[EnterpriseConsolePort]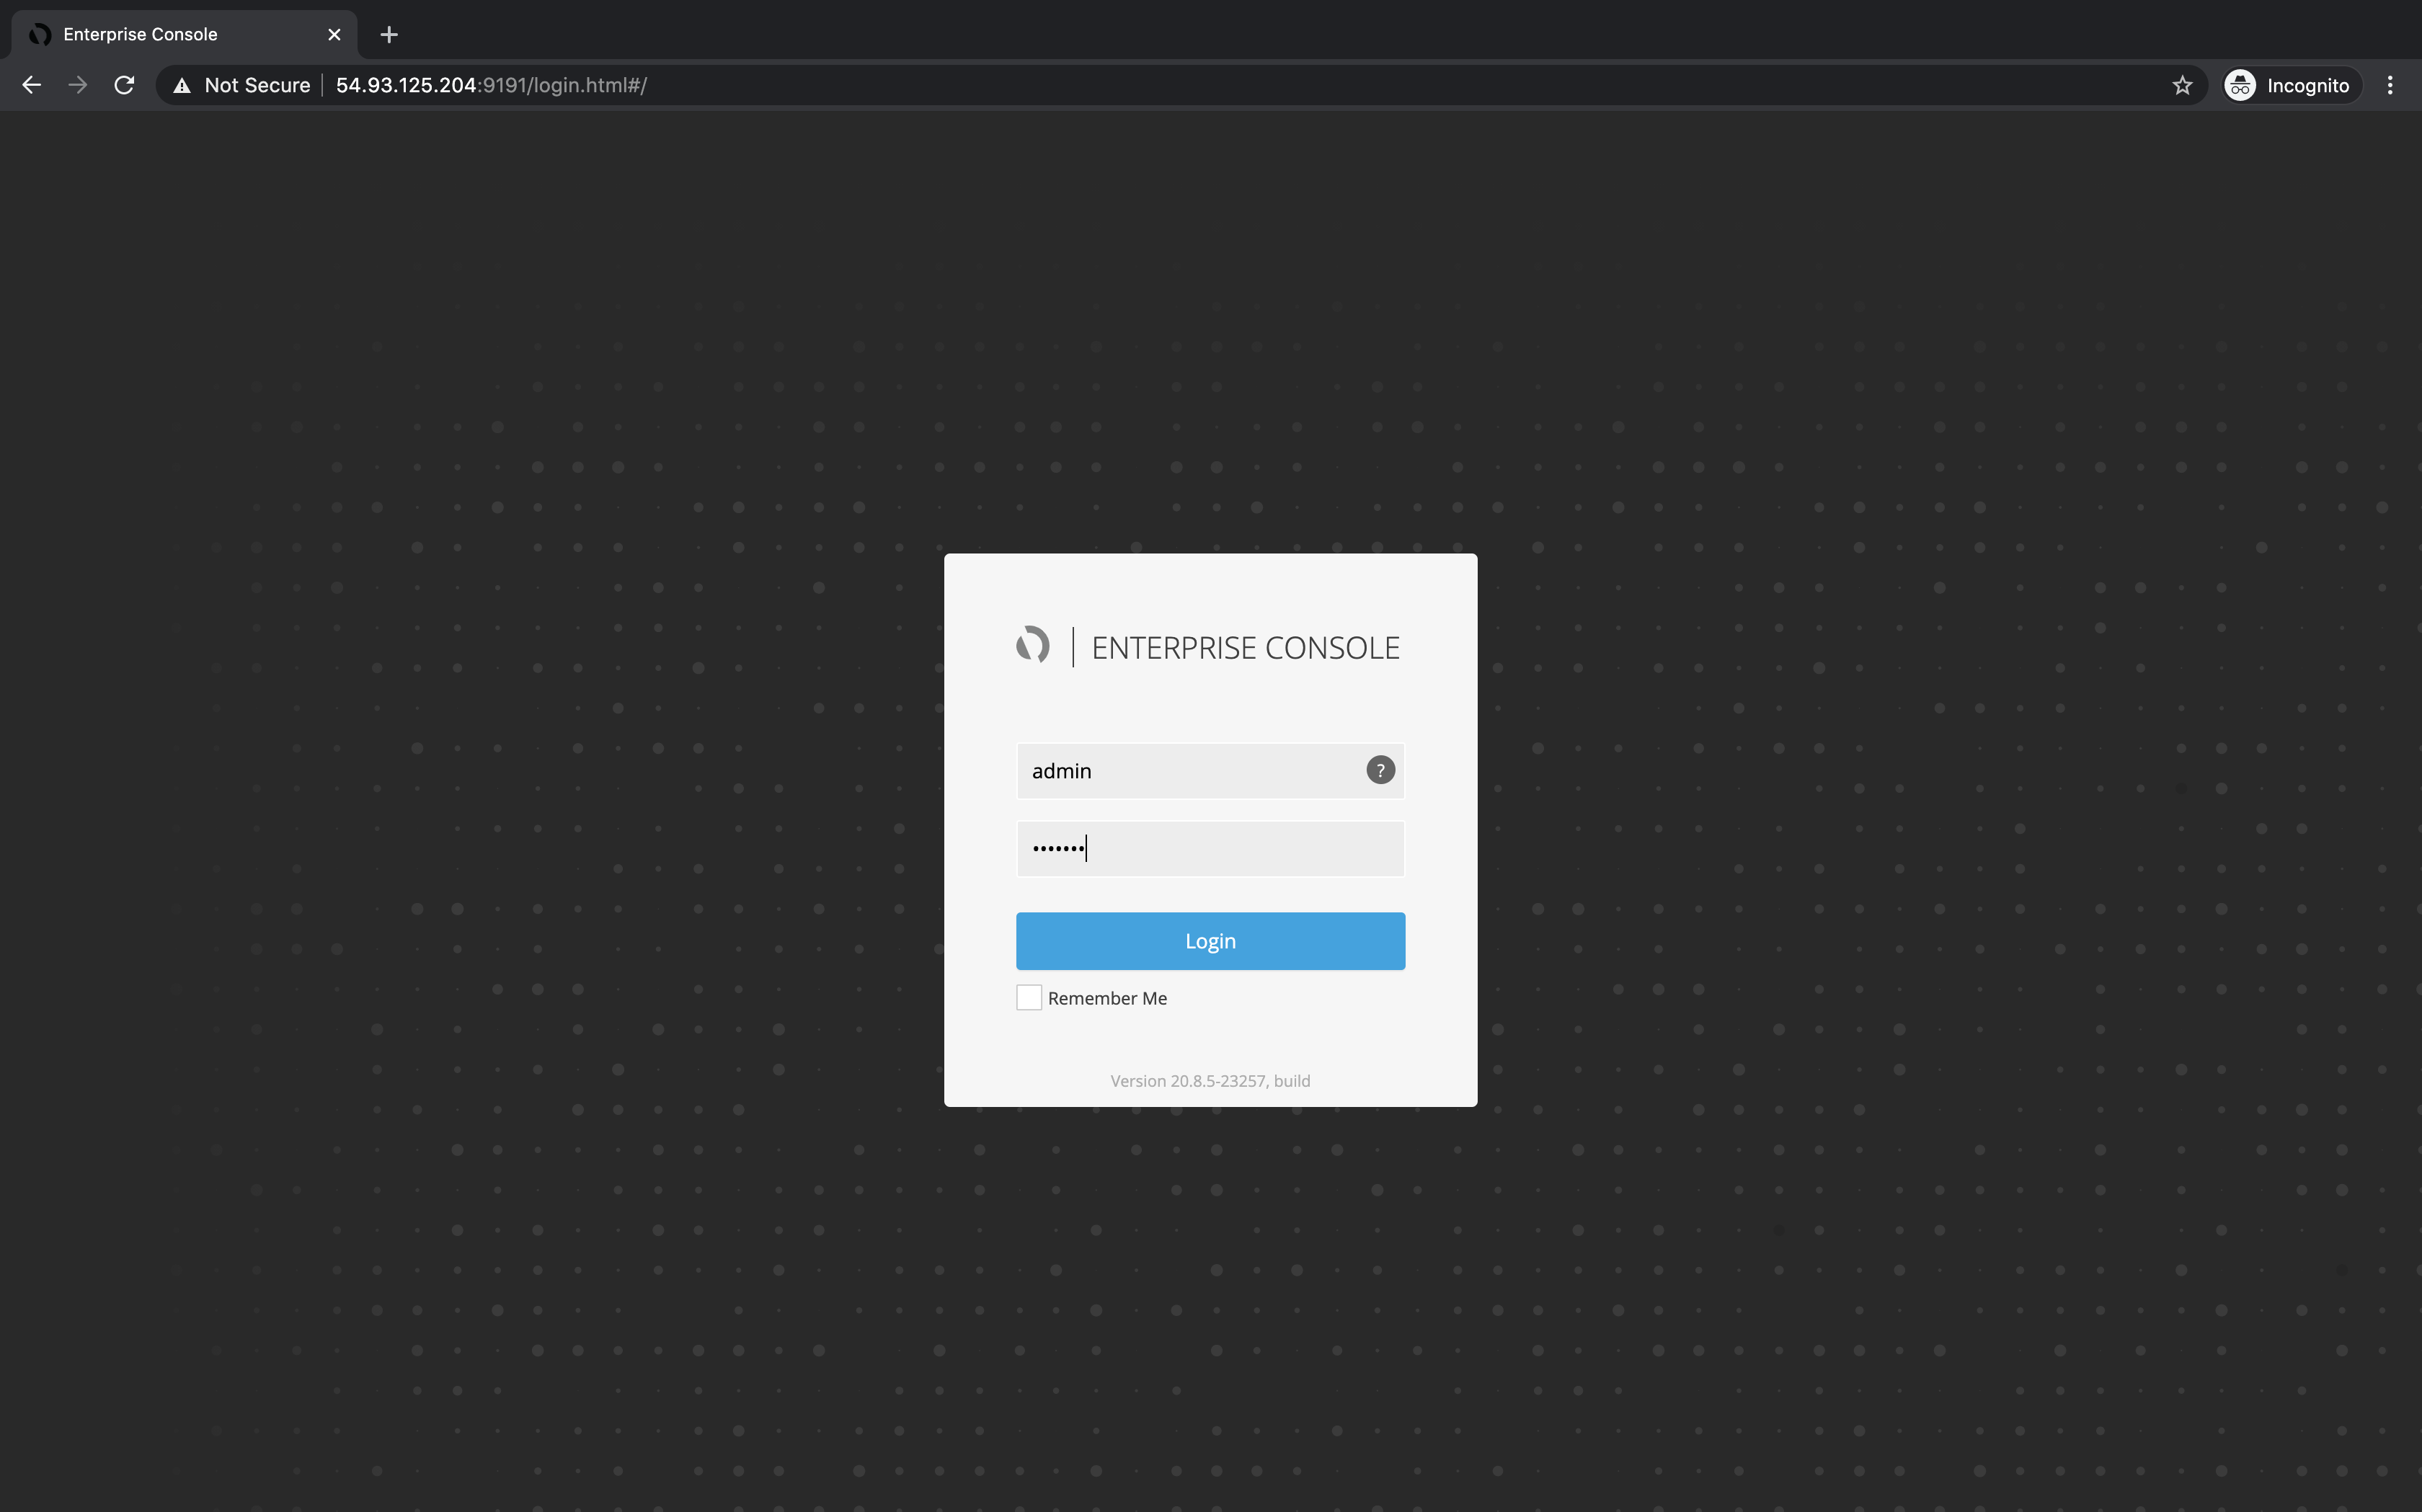
Step 4: Install AppDynamics Controller & Events Service
In the Enterprise Console browser interface. You will use the Enterprise console to install the Controller and Events Service components of the AppDynamics platform. The Controller provides the main AppDynamics GUI which is backed by a MySQL database, while the Events Service is the facility that stores unstructured data generated by various AppDynamics functions.
Installation of both components can be accomplished using the CLI, but that procedure is beyond the scope of this lab. Also note that the lab focuses on installation and configuration procedures in a learning environment, but you should be aware that additional steps may be necessary to address security, performance, availability, and scalability considerations in a production deployment.
Reference documentation can be found on the AppDynamics web site - Controller Documentation and Events Service Documentation.
1 . From the Enterprise Console UI, select the Install tab and click the Express Install type.

2 . In the Name the Platform section, Provide a name of your choice for the platform and confirm the default Installation Path value is a subdirectory of the installation directory we specified earlier.

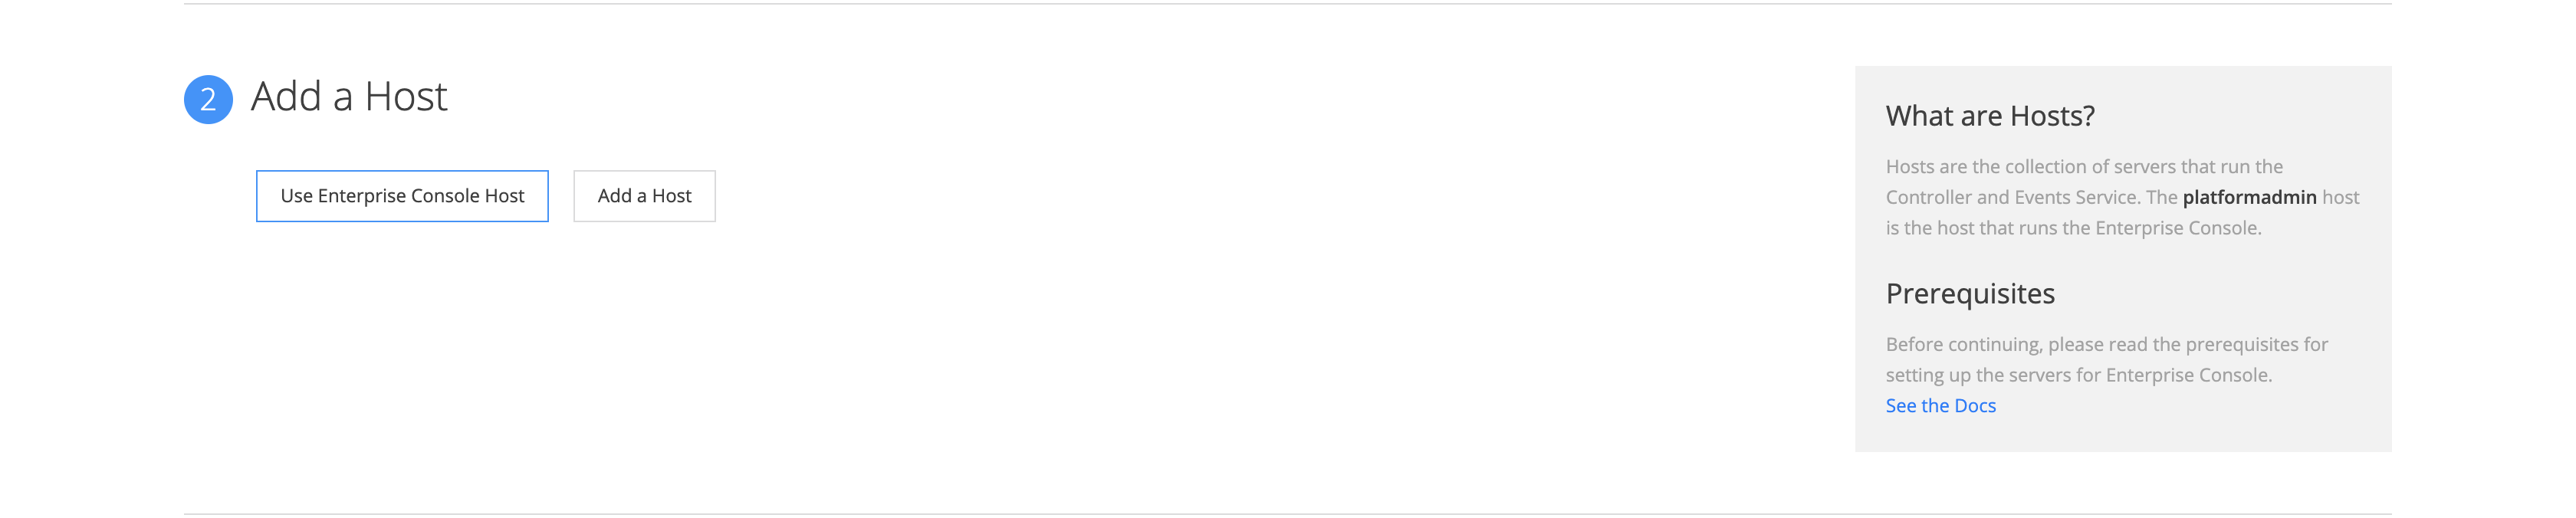
3 . In the Add a Host section, choose Use Enterprise Console Host
4 . In the Install the Controller section:
- Select the Demo profile
- Set the Controller Admin Username to admin
- Set the Controller Admin Password to welcome1
- Set the Controller Root User Password to welcome1
- Set the Database Root Password to welcome1
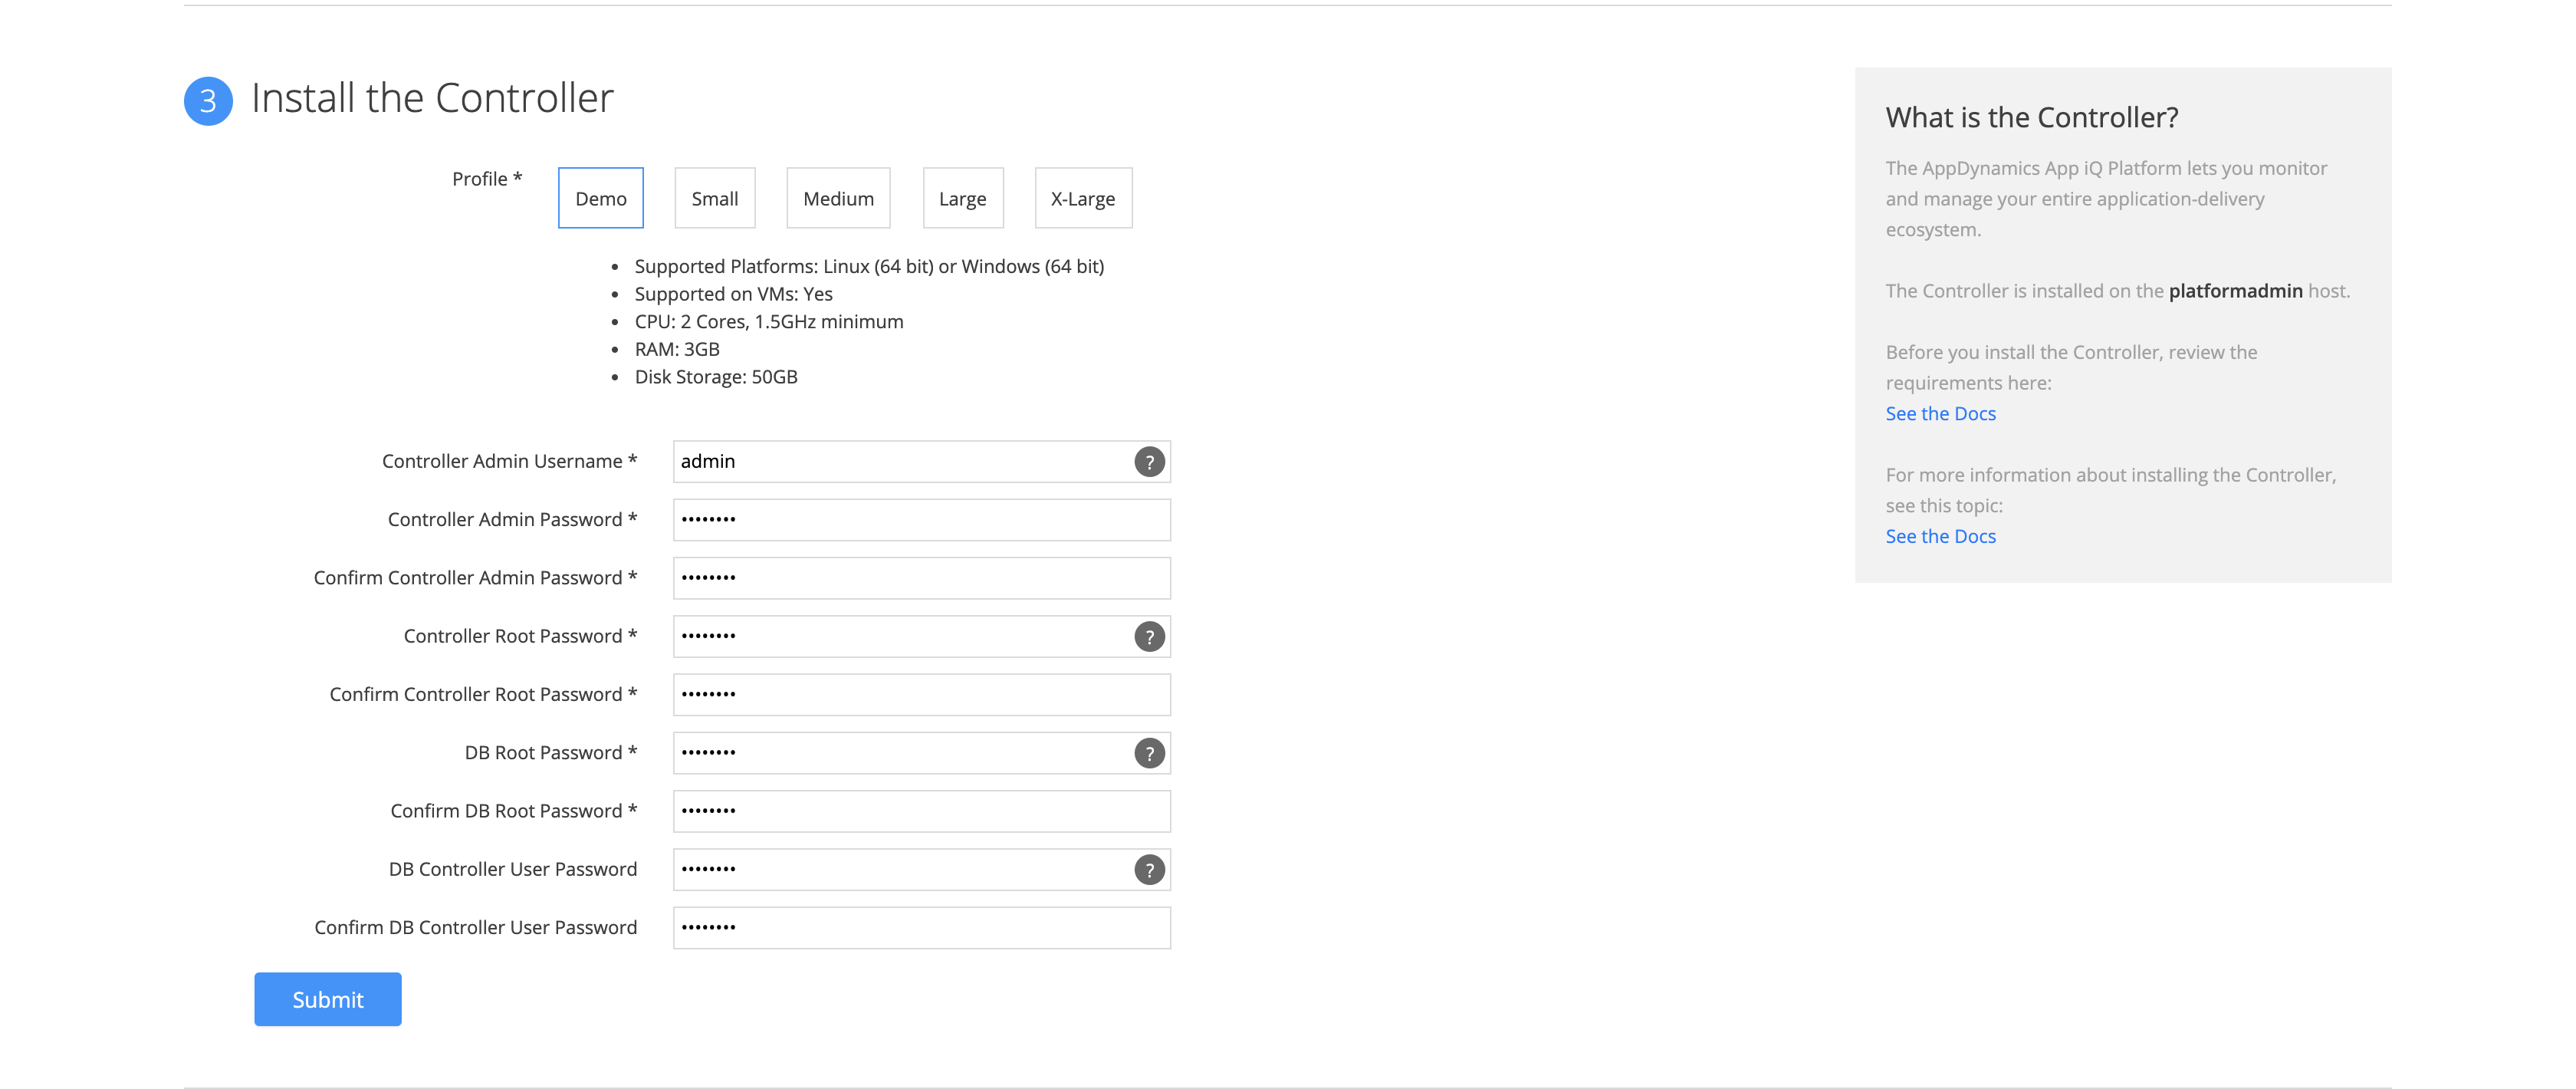
5 . Click the Submit button, The installation will begin immediately but it may take a few minutes before the jobs appear and begin reporting their progress on the page.
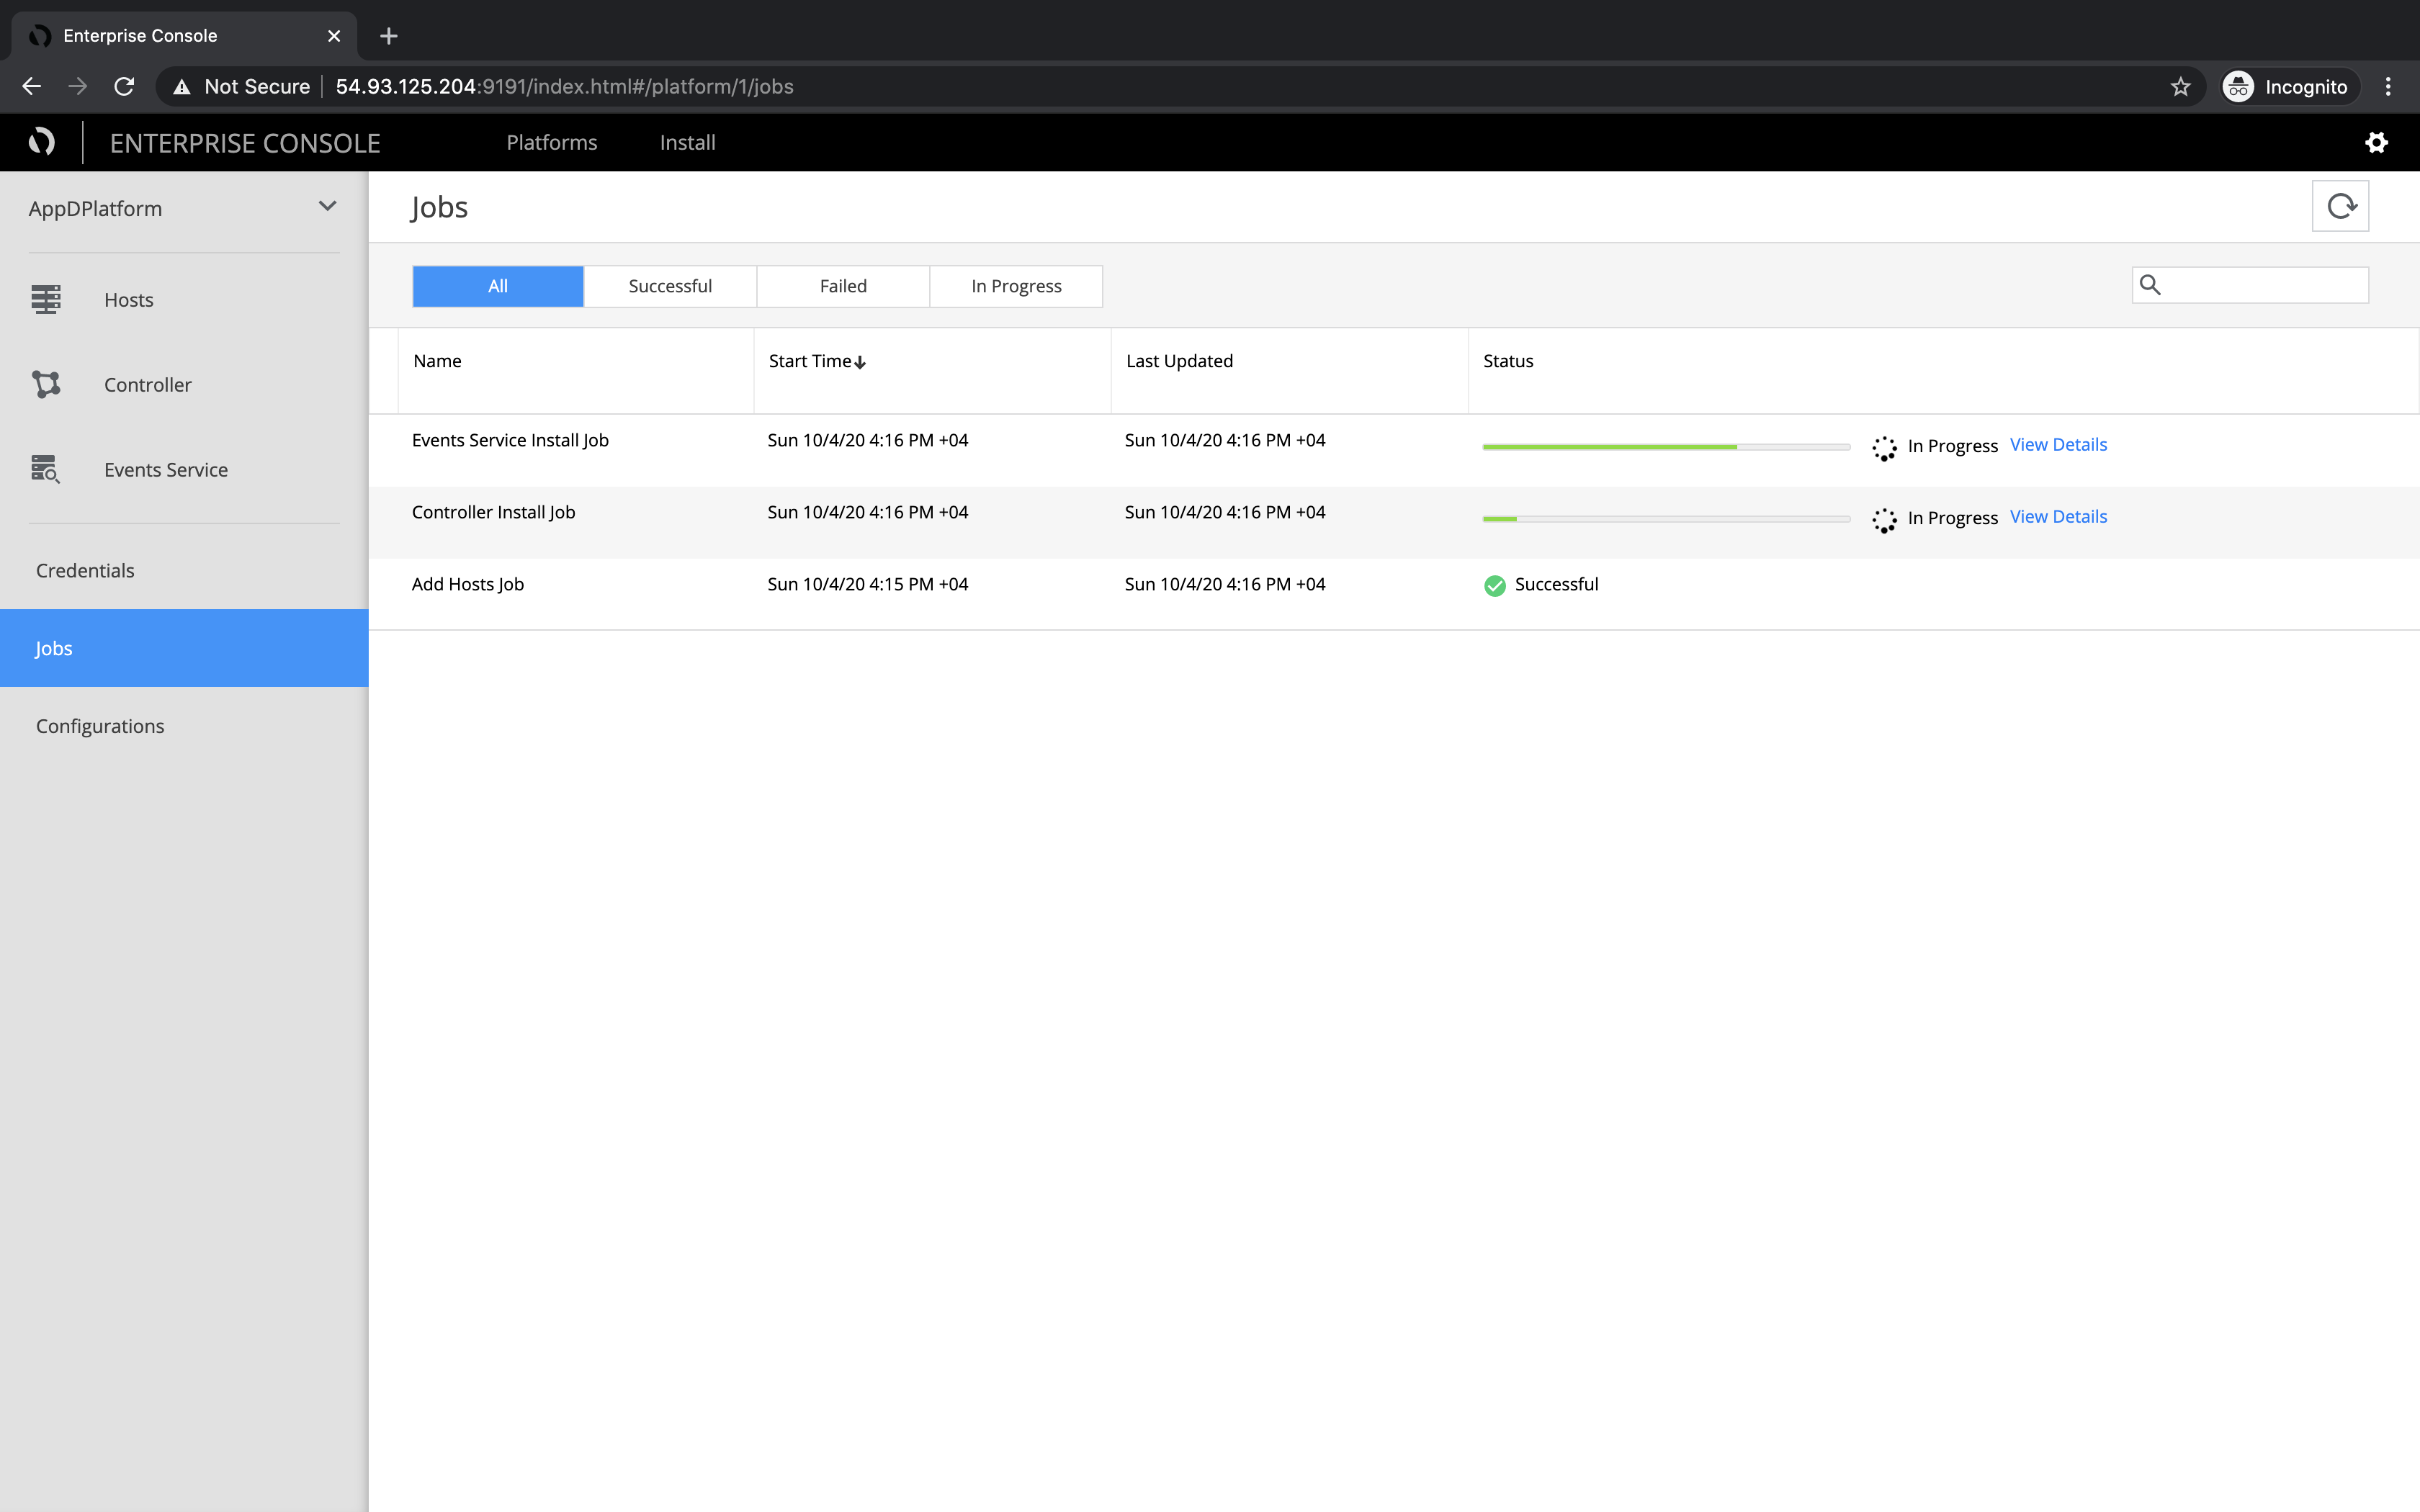
6 . After the jobs have completed successfully (up to 15 minutes), click the Controller and Events Service sections to make sure each shows a health state of Normal.

7 . To confirm the Controller is running properly, verify you can connect to its URL in a web browser and authenticate using the information specified in Step 4 (Username: admin, Password: welcome1)
http://[your-ip-address]:8090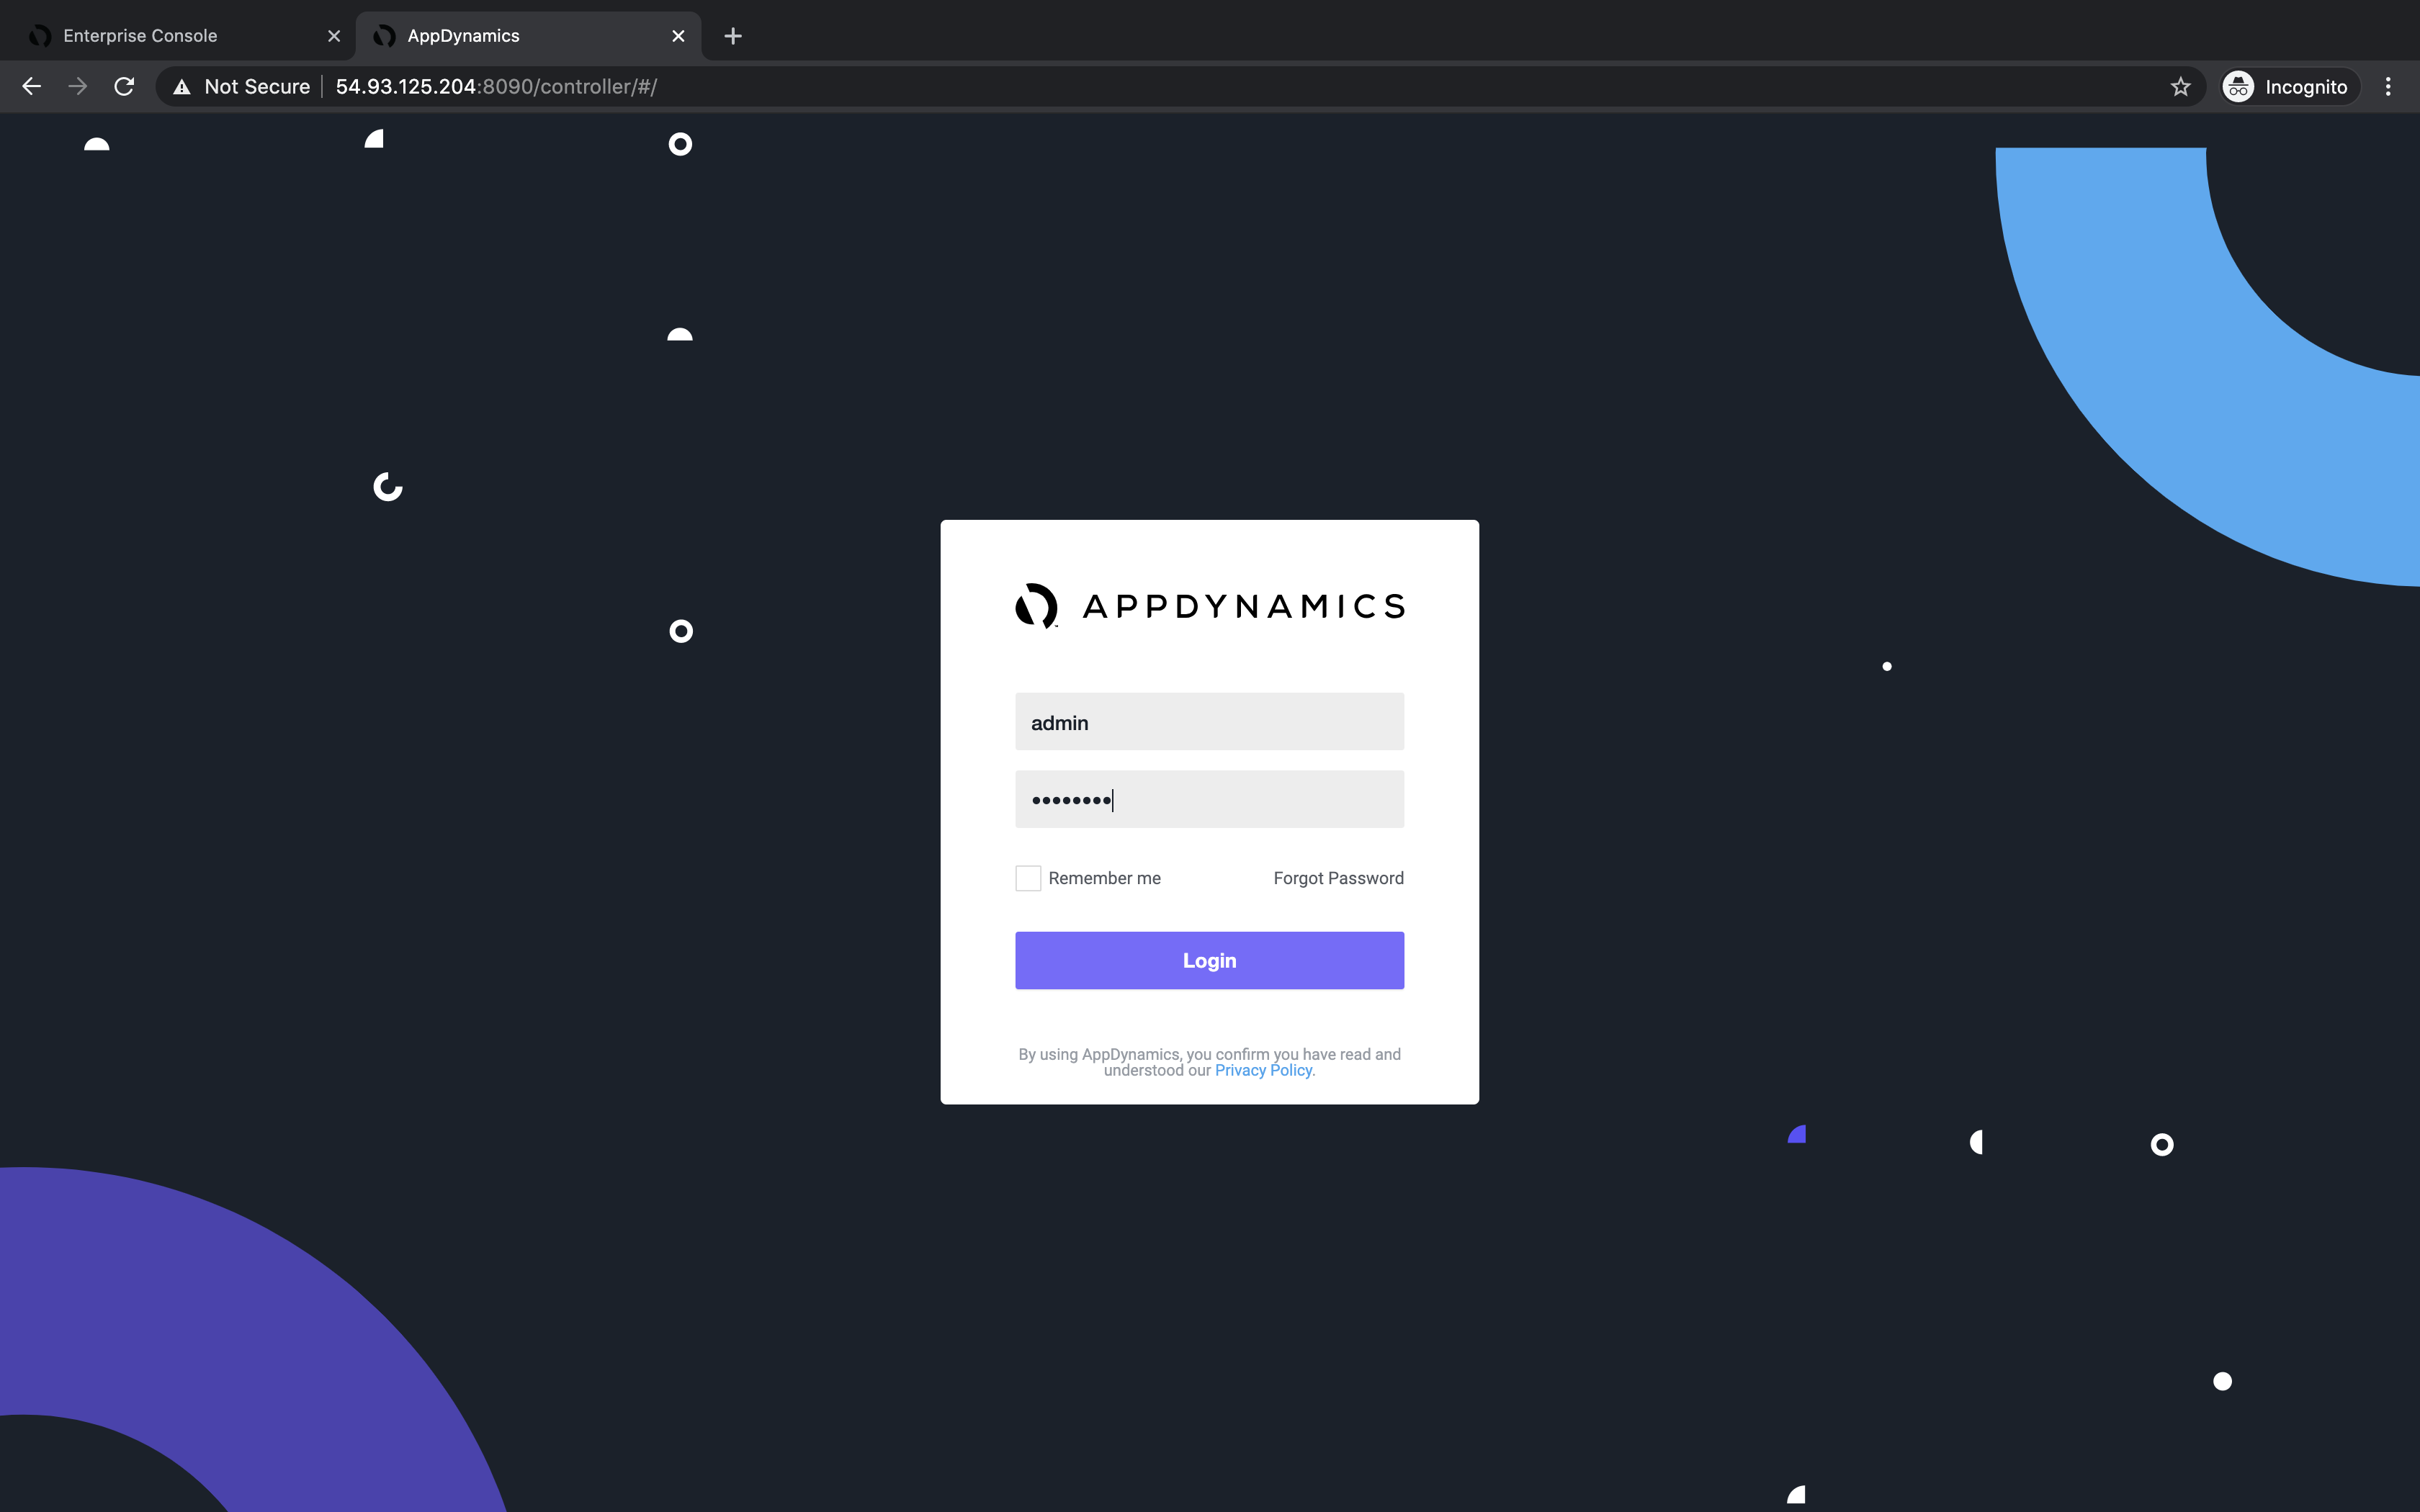
8 . Ping the Events Service API port in a browser. A successful “pong” response confirms the service is running properly. This step can be skipped if you are using a SaaS controller.
http://[your-ip-address]:9080/_ping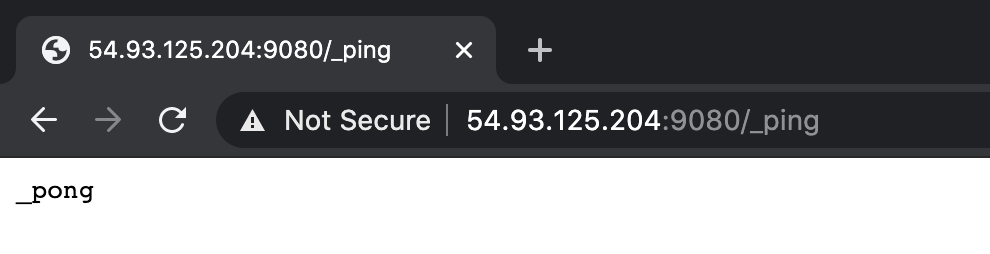
9 . Deploy the provided license by coping your license file (.lic) to the controller directory at /opt/appd/platform/product/controller/
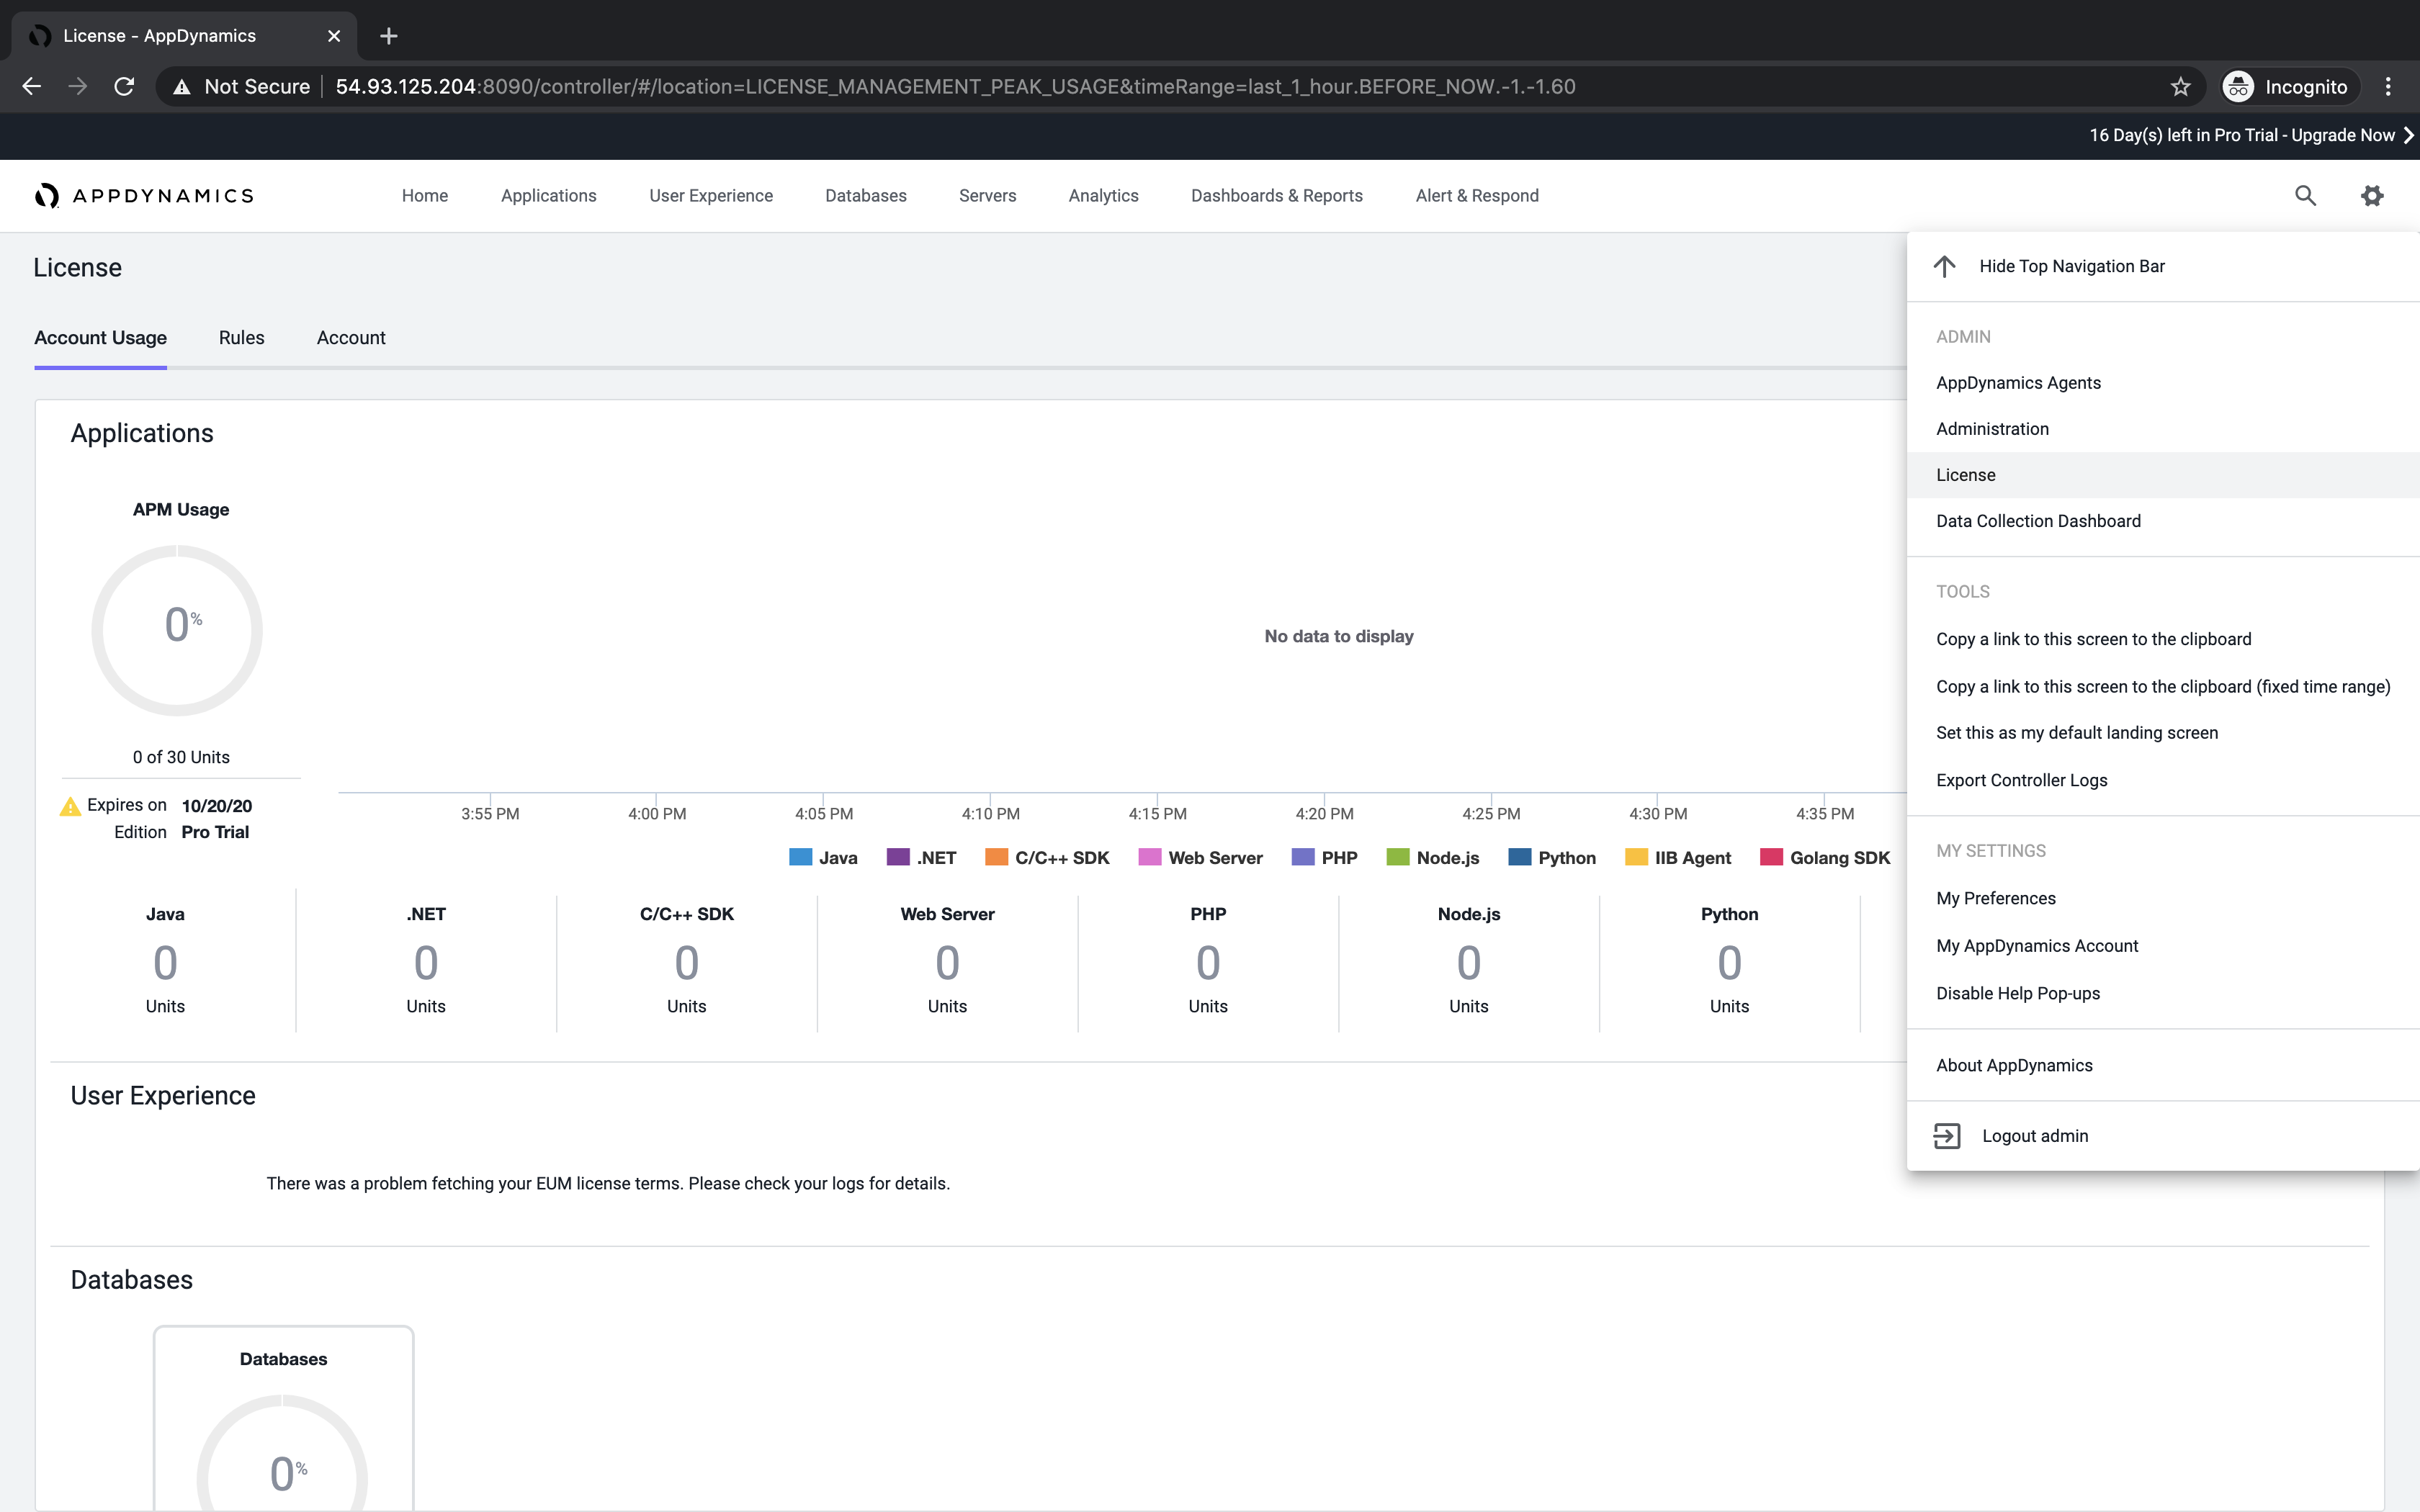
10 . In the Controller UI, confirm the new license has been applied by navigating to the Settings / Gear icon (⚙) in the upper right corner of the page and selecting License. Make sure the the license details now show it as a Pro Trial edition and includes entitlements for different agents. Note: If the licenses are not reflected as below in 10 minutes, perform a Controller Restart (Without database restart) from the Platform Admin.
Step 5: Install End User Monitoring Server
In this exercise, you will be setting up the End User Monitoring (EUM) Server. This component acts as the on-premise processor for data sent from the browser and mobile EUM agents. The EUM Server is not currently integrated with the Enterprise Console so the installation portion will be done from the lab host CLI.
Reference documentation can be found on the AppDynamics documents site - EUM Server Documentation.
1 . Open a New Private Window (New Incognito Window in Chrome) to avoid using cached controller credentials from previous browser sessions.
2 . Access the Controller Administration Console by connecting to its URL and authenticating with credentials you specified in Controller Installation wizard (Username: admin, Password: welcome1). This is a separate interface from the primary Controller UI.
http://[your-ip-address]:8090/controller/admin.jsp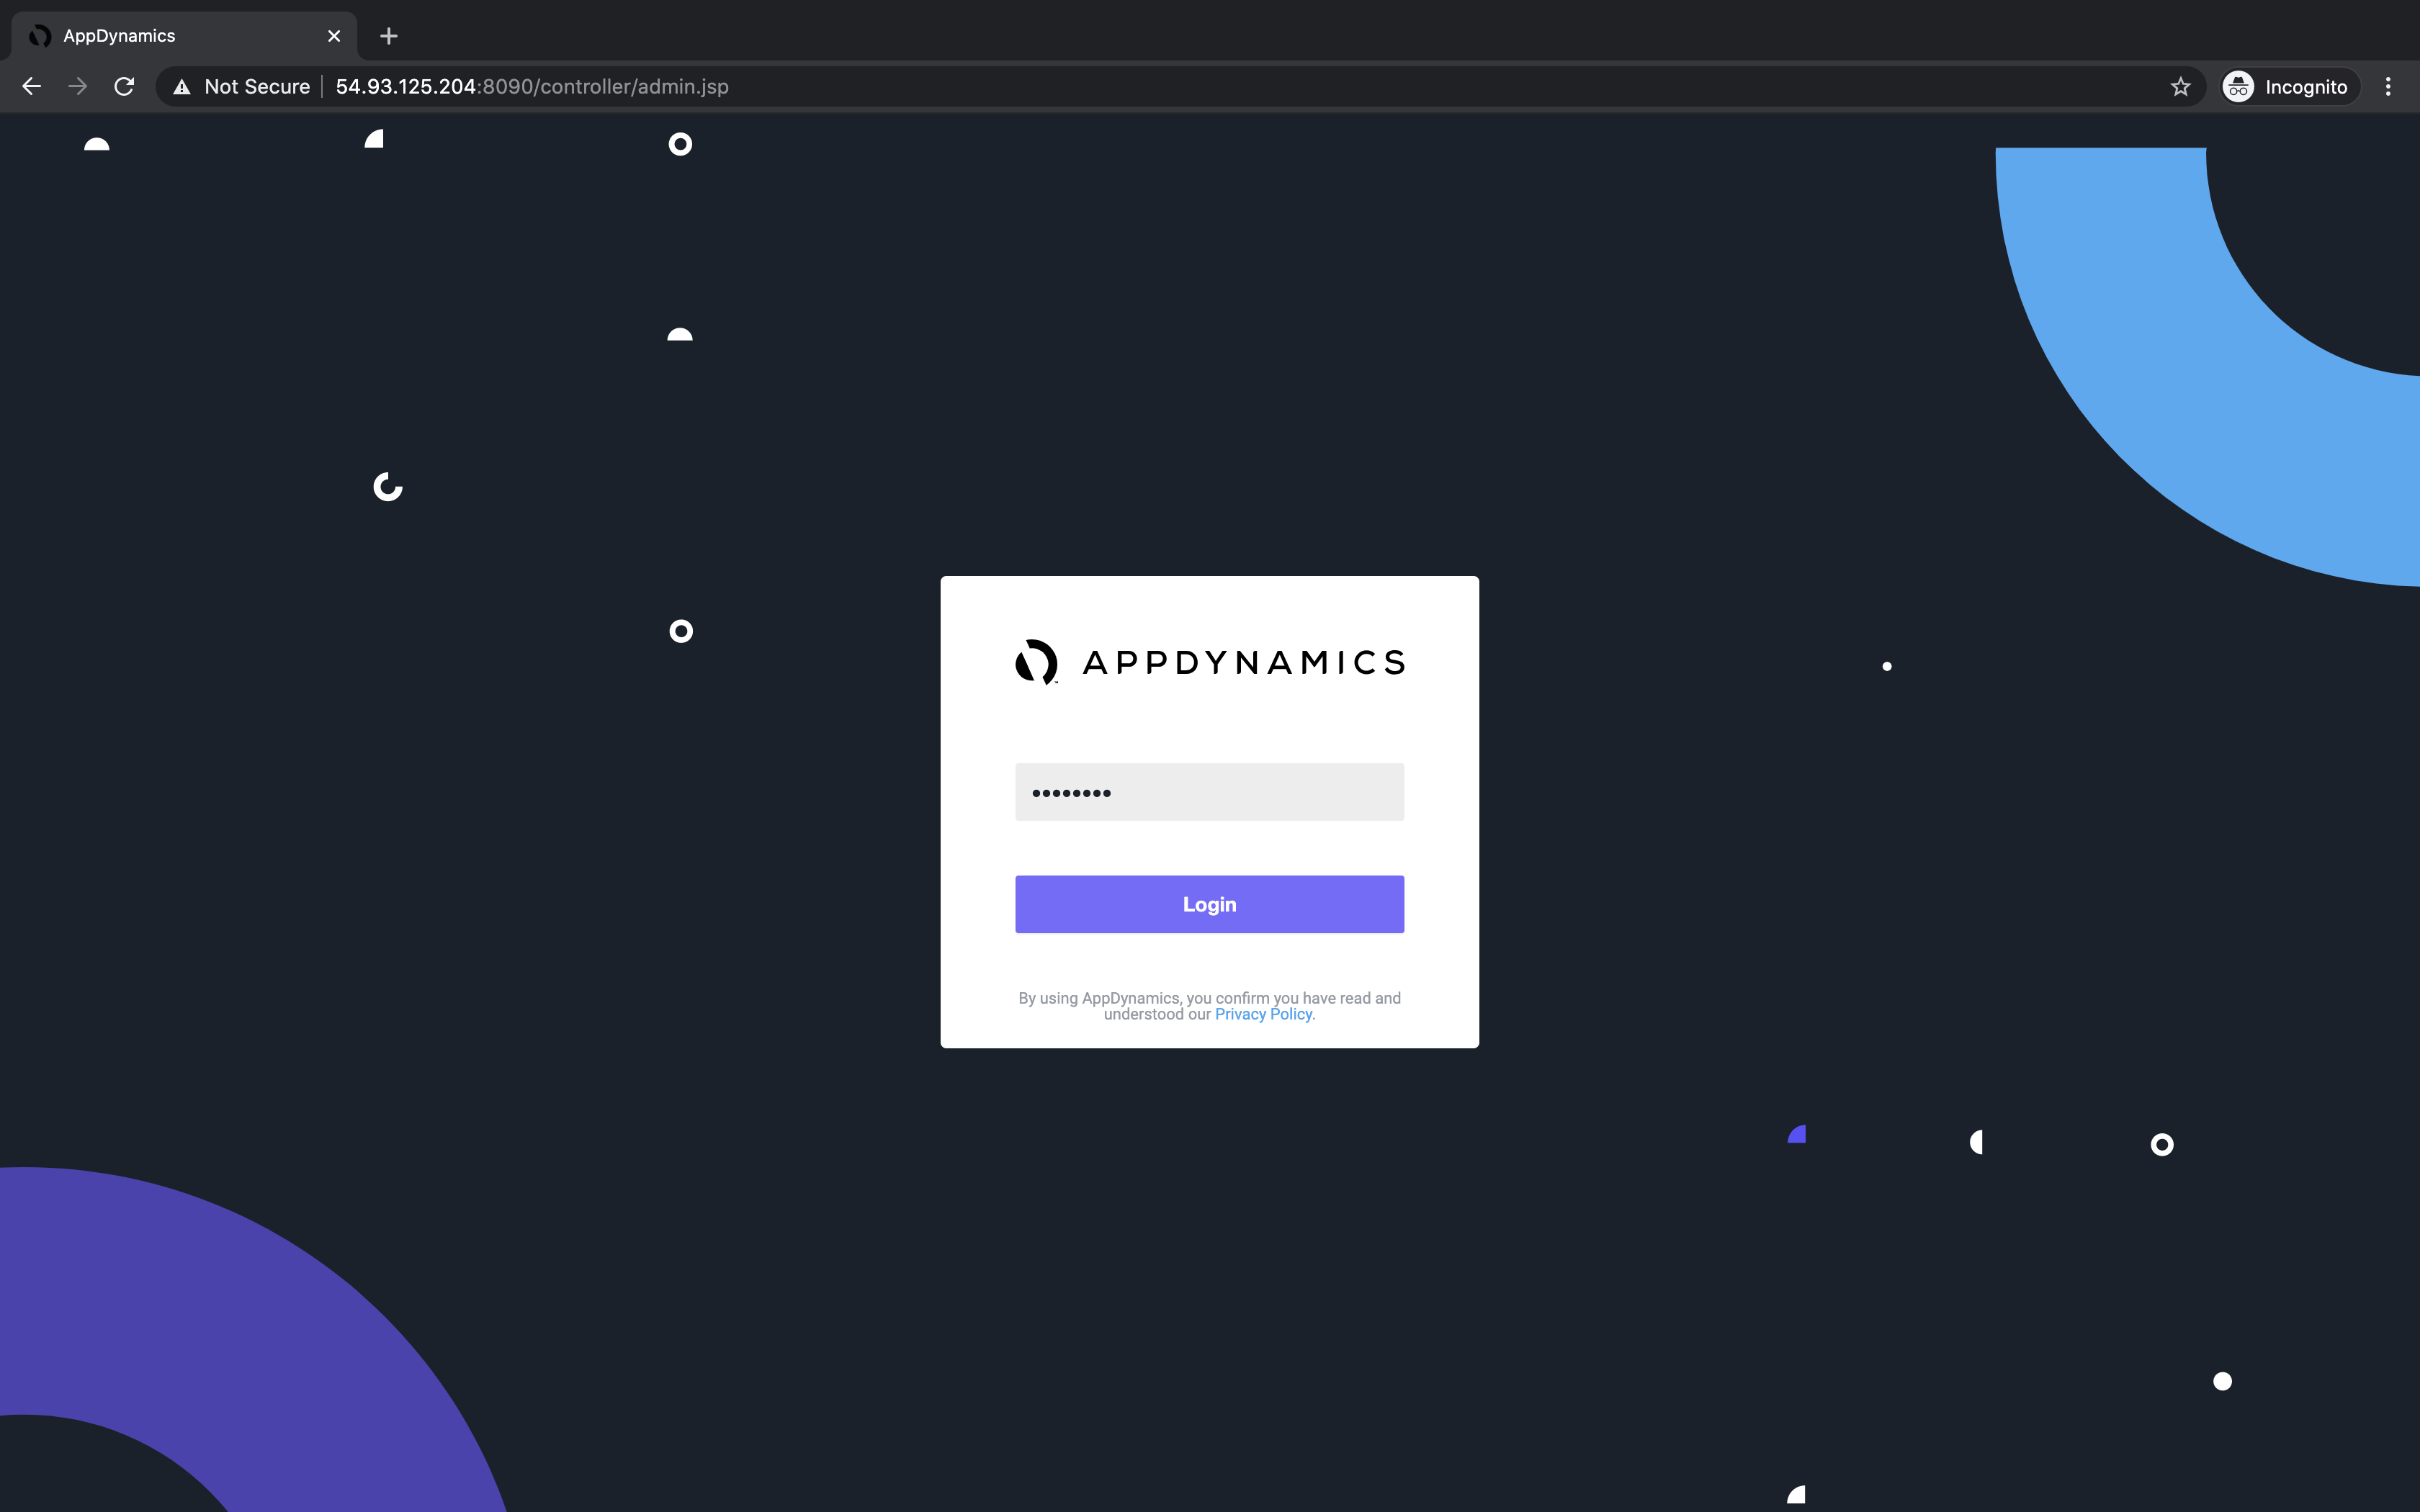
3 . Navigate to the Controller Setting section, and search for appdynamics.es.eum.key parameter
- Note the Events Service Key for later use in Step 10.

4 . Connect the EUM Server with the AppDynamics Controller & Events Service by updating the following parameter values in the Administration Console, clicking the Save button after each change
- eum.beacon.host = [your-ip-address]:7001 #That should be the EUM Server IP Address
- eum.beacon.https.host = https://[your-ip-address]:7002 #That should be the EUM Server IP Address
- eum.cloud.host = http://localhost:7001 #That should be the EUM Server IP Address
- eum.es.host = [your-ip-address]:9080 #That should be the Events Server IP Address
- eum.mobile.screenshot.host = [your-ip-address]:7001 #That should be the EUM Server IP Address
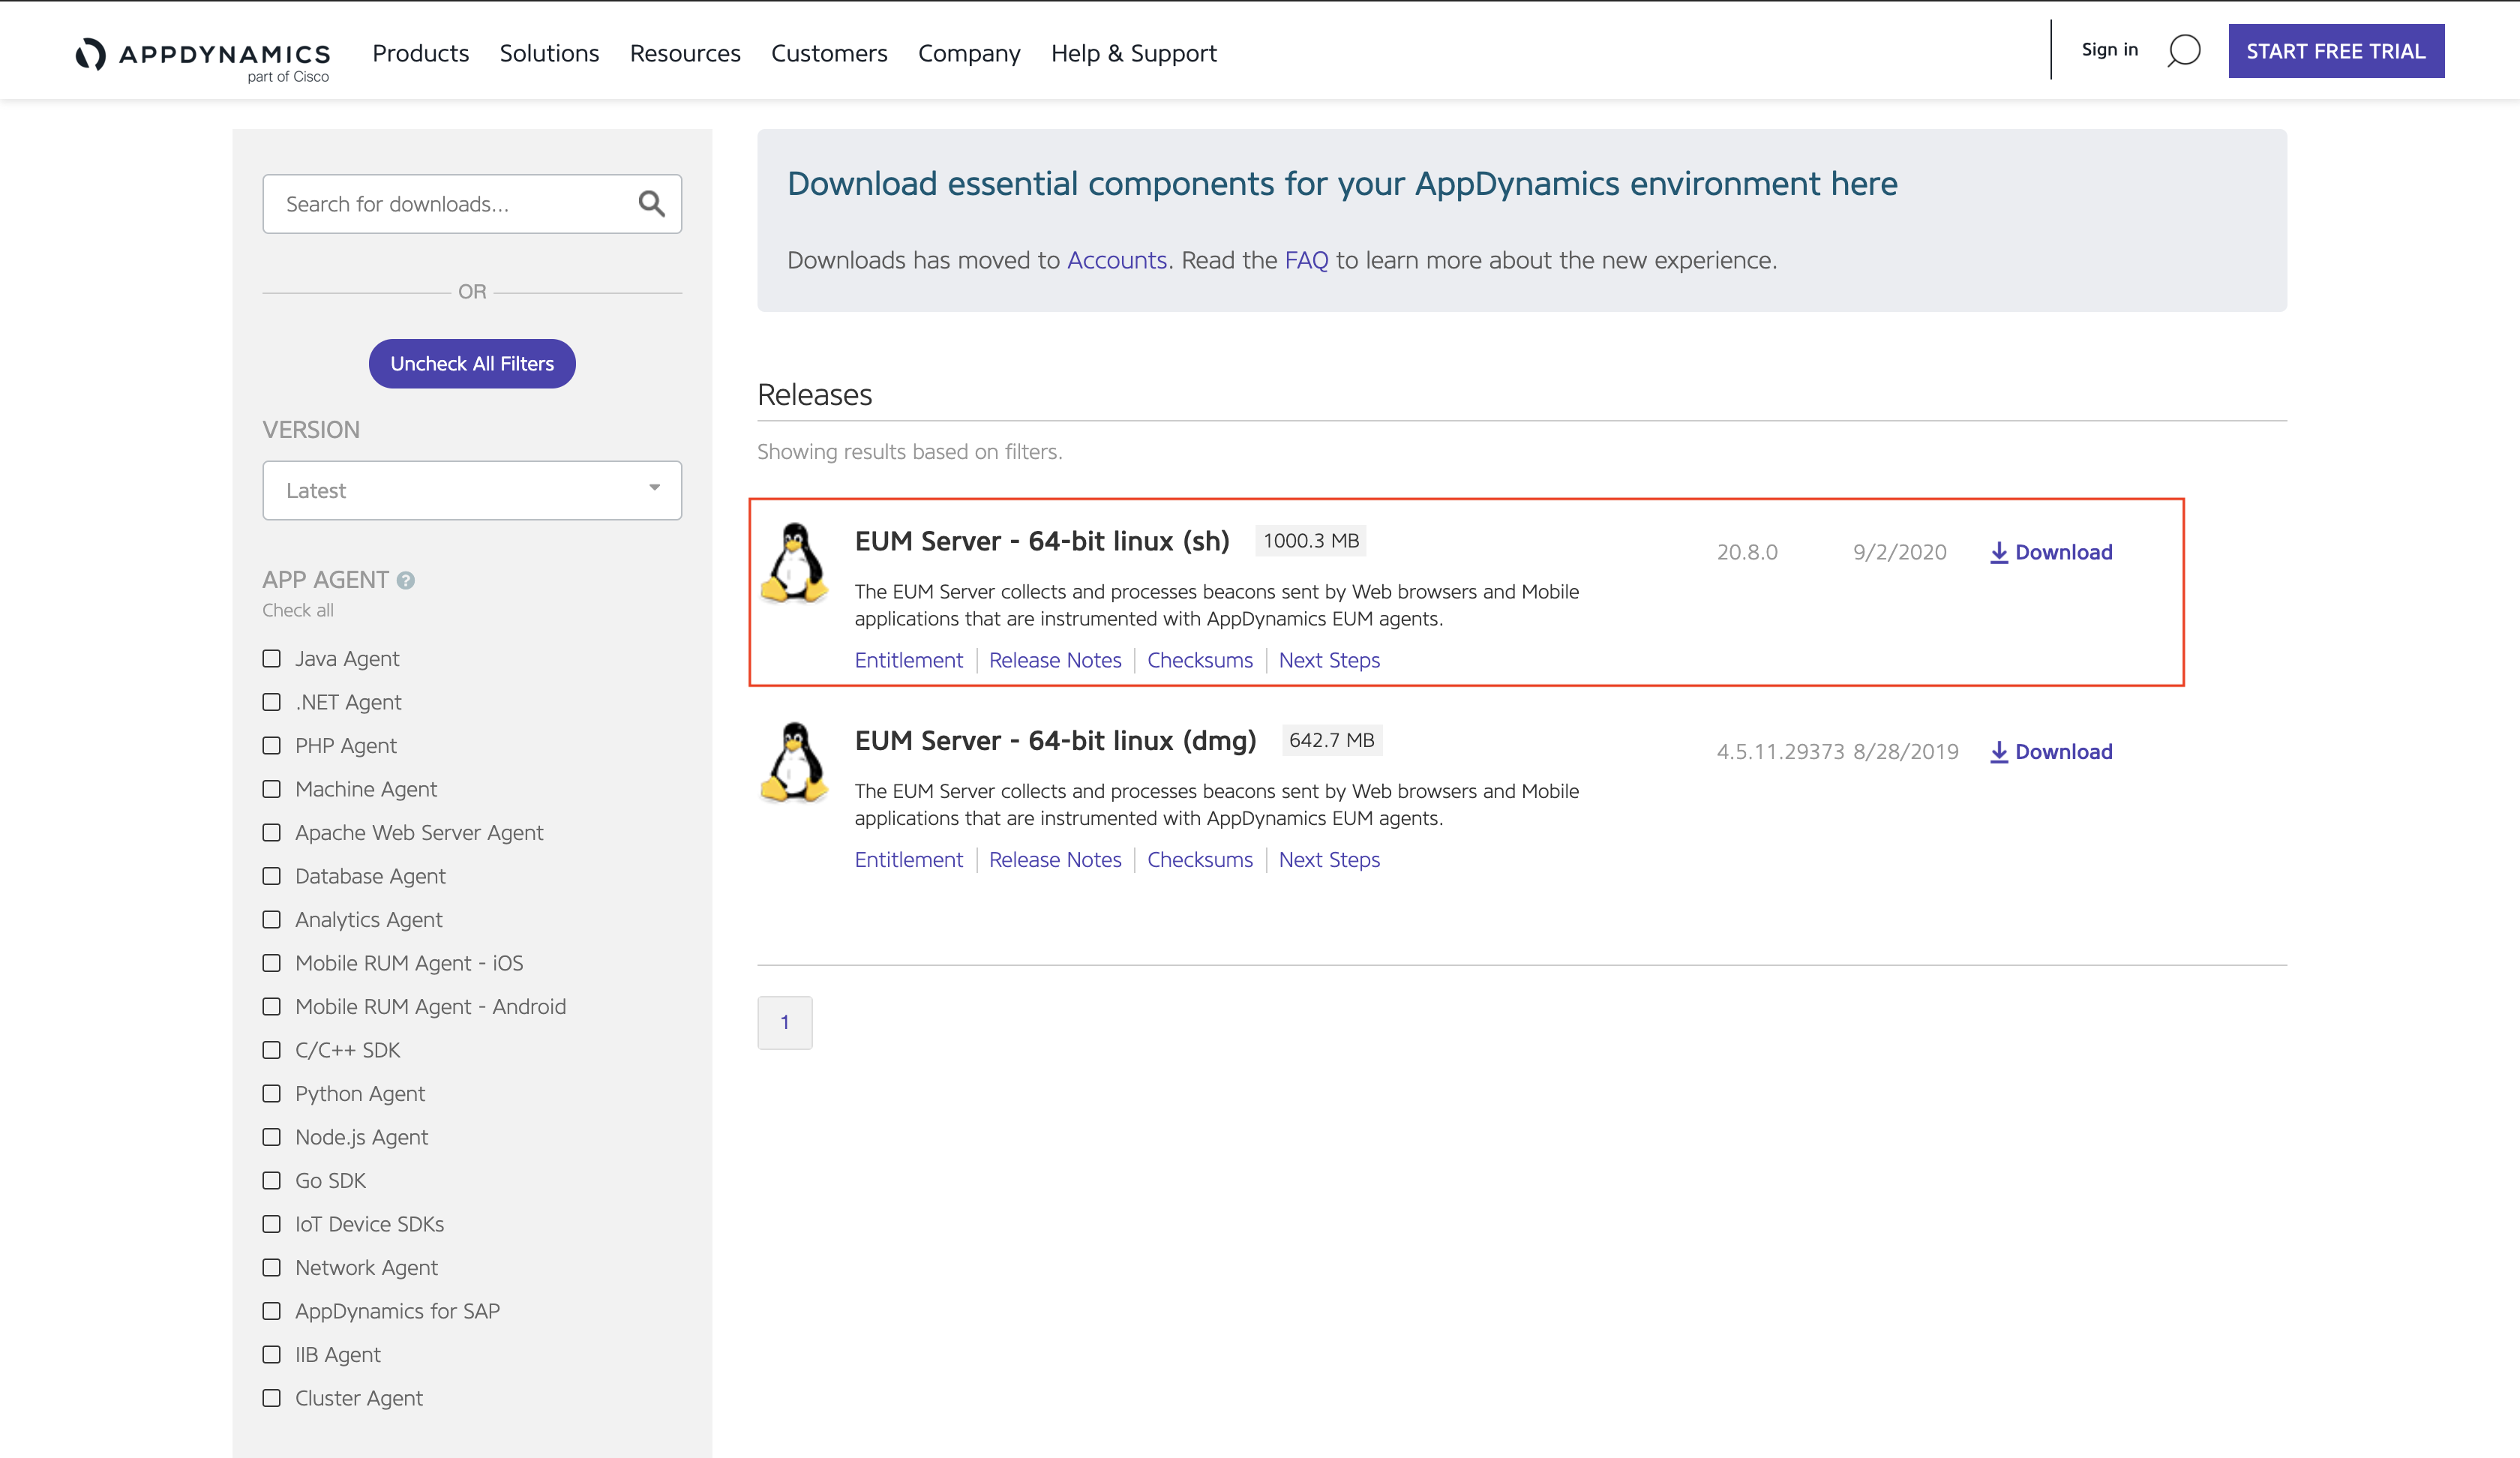
5 . Download the EUM Server Installer Script to the lab host. Log into www.download.appdynamics.com to download the “EUM Server - 64-bit linux (sh)”
Note: If you do not have access to the download binary using the instructions above, please use the download links provided in the PDF associated with this section of the course on Black Belt.
6 . Copy the .sh file to your Host either using SCP on if your Desktop is MAC/Linux or using WinSCP if your Desktop is Windows
7 . On the Host, Make the installer script executable:
chmod a+x euem-64bit-linux-20.x.x.x.sh8 . Install the Platform Admin software:
sudo su
./euem-64bit-linux-20.x.x.x.sh
With inputing the below
I accept the agreement: 1
Where should AppDynamics End User Monitoring be installed?: /opt/appdynamics/eum
Select Installation Type: 1 (Demo)
Database Port: 3388 (default)
Root User Password: welcome1 (the same as specified during the Controller Database Setup)
eum_user Password: AppD123
HTTP Port: 7001 (default)
HTTPS Port: 7002 (default)
Key Store Password: AppD123
After a few minutes, you should see output similar to that shown below…
Setup has finished installing AppDynamics End User Monitoring on your computer.
To finish setting up AppDynamics End User Monitoring Server, you must complete these post installation tasks:
Provision the EUM license.
Configure the Events Service properties and other properties in the file EUM_HOME/bin/eum.properties, then restart AppDynamics End User Monitoring Server
Connect the AppDynamics End User Monitoring Server with AppDynamics Controller through the Controller Administration Console.
For more information, see EUM Server Deployment.
Finishing installation ...
9 . Verify the EUM Server is running by pinging the EUM Server port in a browser. A successful “ping” response confirms it is responding properly.
http://[your-ip-address]:7001/eumaggregator/ping
10 . From the EUM processor directory on on the lab host (you must be in eum-processor directory for the command to run properly), provision the EUM portion of the license file:
cd /opt/appdynamics/eum/eum-processor

./bin/provision-license /opt/appdynamics/platform/product/controller/license.lic
You should see output similar to that shown below…
Reading the license file at /opt/appdynamics/platform/product/controller/license.lic
Successfully read the license file
Provisioning from license file /opt/appdynamics/platform/product/controller/license.lic
Register the account ...
AccountRegistrationResult:
isValid:true, isAlreadyRegistered:false, description:Successfully completed account registration, Account{accountName='test-eum-account-sherifmedhat-1601814891057', globalAccountName='bogus global account name', key='[FILTERED]', timestamp=1601826813030, lastAggregatedMin=1601826780000, accountStatus='Y', activityStatus='Y', lastActivityTimestamp=1601826813030, activityVersion='0', controllerEumApiVersion='0', controllerVersion='unknown', crMapFilesGeneration='-1', analyticAccountCreated='N', licenseTermsUpdateSourcePrecedence='0', deleted=false, deletedTime='1970-01-01T00:00:00.000Z}

EUM Account [test-eum-account-sherifmedhat-1601814891057] with key [f3b8b684-913f-4642-a5e3-709468c566dc] is registered and license terms are provisioned in the EUM PROCESSOR
The Warning message above can be ignored…
11 . Using a text editor of your choice, configure the Events Service properties by updating the following parameter values in the eum.properties file in /opt/appdynamics/eum/eum-processor/bin/:
cd /opt/appdynamics/eum/eum-processor/bin/

vi eum.properties
and change the below:
analytics.enabled=true
analytics.serverHost=[your-ip-address] #That should be the Events Server IP Address
analytics.accountAccessKey=[eum_key] (the one collected in step 2)
12 . Remaining in the EUM processor directory on on the lab host (you must be in this directory for the command to run properly), restart the EUM Server by stopping the service, confirming the process is no longer running, and starting it:
cd /opt/appdynamics/eum/eum-processor/

bin/eum.sh stop

ps -ef | grep -i eum | grep -v grep (no process should be listed)

bin/eum.sh start

ps -ef | grep -i eum | grep -v grep (one process should be listed)
13 . In the Controller UI, confirm the EUM license has been applied by navigating to the Settings icon (⚙) in the upper right corner of the page and selecting License. In the User Experience section of the page, the Account Name and License Key should be visible. Additionally, the Edition should show EUM Pro or Mobile Pro for Browser Real User Monitoring and Mobile Real User Monitoring, respectively.

Notes
1 . In case of a Server restart, you can start back all the serivces via the CLI:
cd /opt/appdynamics/platform/platform-admin
bin/platform-admin.sh start-platform-admin
bin/platform-admin.sh start-controller-db
bin/platform-admin.sh start-controller-appserver
bin/platform-admin.sh submit-job --platform-name AppDPlatform --service events-service --job start
cd /opt/appdynamics/eum/eum-processor/
bin/eum.sh start
Next
We’ll walk through the steps to setup the lab application server on a different host/vm.