Install Java APM Agent
In this exercise you will perform the following actions:
- Upload the Java agent file to your Application VM
- Unzip the file into a specific directory on the file system
- Update the Java agents XML configuration file
- Modify the Apache Tomcat startup script to add the Java agent
Upload Java Agent to Application VM
The process of uploading the Java agent file will vary depending on your workstation’s operating system. Copy the Java agent ZIP file either using SCP if your Desktop is MAC/Linux or using WinSCP if your Desktop is Windows.
Install the Java Agent
Create the directory structure where you will unzip the Java agent zip file.
cd /opt/appdynamics

mkdir javaagent
Copy the Java agent zip file to the new directory and unzip the file. The name of your Java agent file may be slightly different than the example below. (assumes you uploaded the zip file to the /tmp directory)
cp /tmp/AppServerAgent-20.3.0.29587.zip /opt/appdynamics/javaagent/

cd /opt/appdynamics/javaagent

unzip AppServerAgent-20.3.0.29587.zip
Update the Java Agent configuration file
If you are using an newer version of the controller where you previously typed in the Application, Tier, and Node names when downloading the Java Agent, then you don’t need to update the Java Agent configuration file.
You will now need to update the Java agent’s XML configuration file. There are three primary ways to set the configuration properties of the Java agent. These take precedence in the following order.
- System environment variables.
- JVM properties passed on the command line.
- Properties within the controller-info.xml file.
There are over twenty properties with the controller-info.xml file. There are eight properties that typically need to be changed in the controller-info.xml file.
- controller-host
- controller-port
- controller-ssl-enabled
- application-name
- tier-name
- node-name
- account-name
- account-access-key
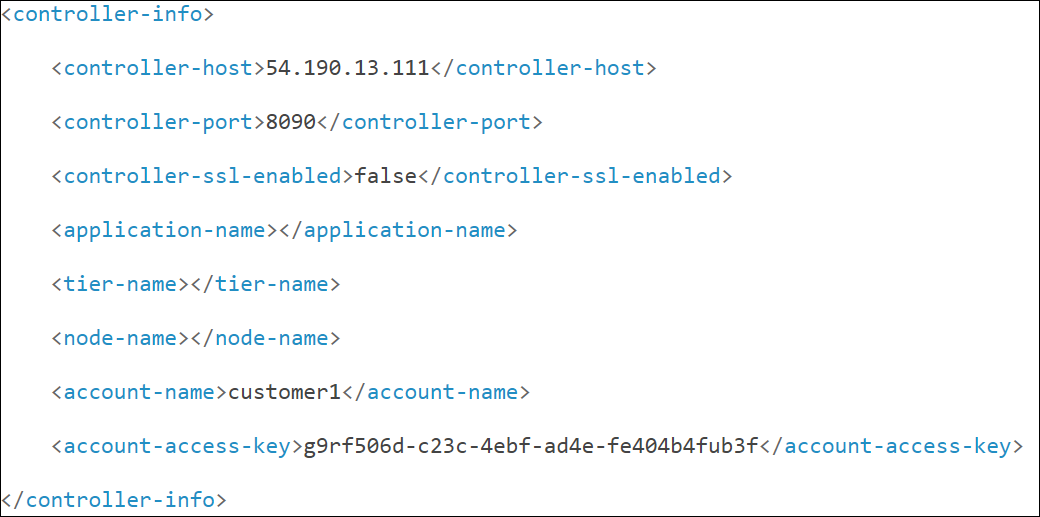
Five of those properties have been pre-populated by the Controller when you downloaded the agent from there. You must update the remaining three.
- application-name
- tier-name
- node-name
Find the controller-info.xml file of the Java agent. The path to the file will be similar to the following example. The version directory will be specific to the version that you downloaded.
cd /opt/appdynamics/javaagent/verXX.X.X.XXXXX/conf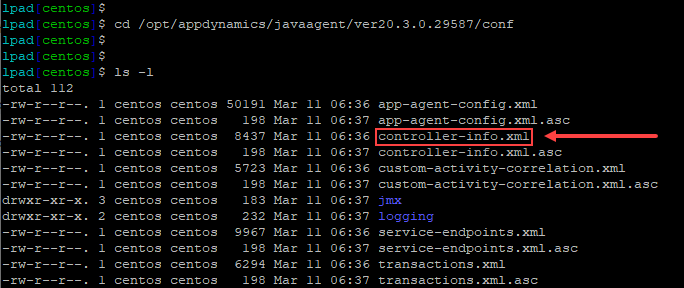
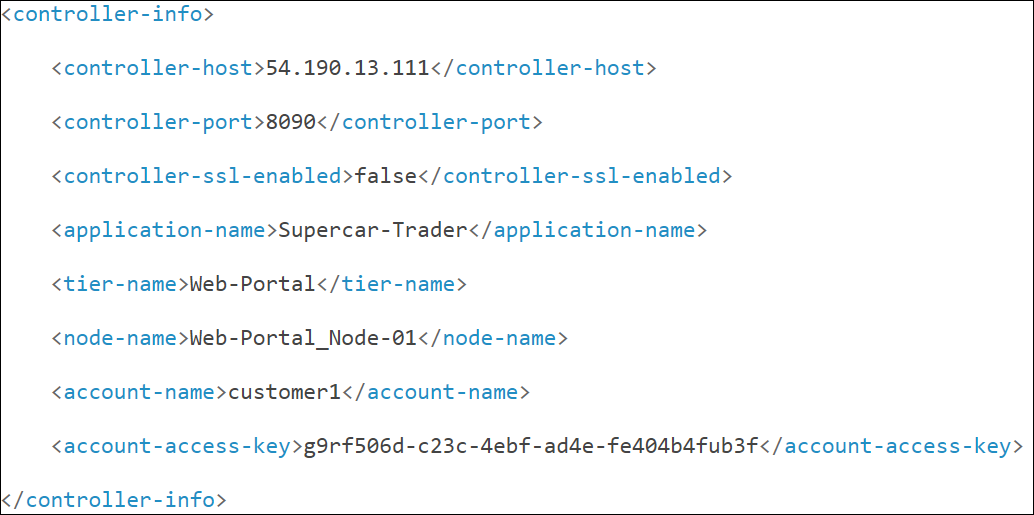
Update the application-name, tier-name, and node-name properties in the file with the following values. Do not change the values of any other properties in the file. If you are using WinSCP to update the file, ensure that the Transfer Settings are set to Text.
<application-name>Supercar-Trader</application-name>
<tier-name>Web-Portal</tier-name>
<node-name>Web-Portal_Node-01</node-name>
Your file should be similar to the following example after you have made the changes and saved the file.
Add the Java Agent to Tomcat
Perform the following steps to add the Java agent to the Tomcat startup script.
Use the following commands to stop the running instance of Apache Tomcat.
cd /usr/local/apache/apache-tomcat-9/bin

./shutdown.sh
Find the catalina.sh startup file for Apache Tomcat. The file is located in the following directory.
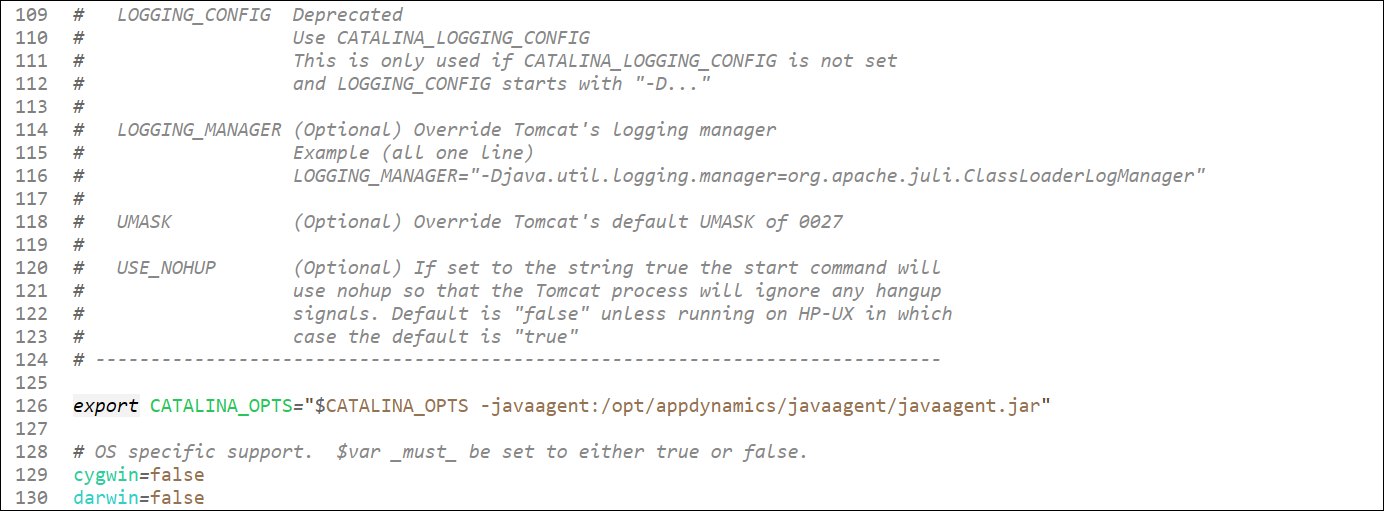
/usr/local/apache/apache-tomcat-9/binUpdate the catalina.sh file and add the following export command right after line 124 in the file. If you are using WinSCP to update the file, ensure that the Transfer Settings are set to Text.
export CATALINA_OPTS="$CATALINA_OPTS -javaagent:/opt/appdynamics/javaagent/javaagent.jar"Your file should be similar to the following example after you have made the changes and saved the file.
Restart Apache Tomcat using the following commands.
cd /usr/local/apache/apache-tomcat-9/bin
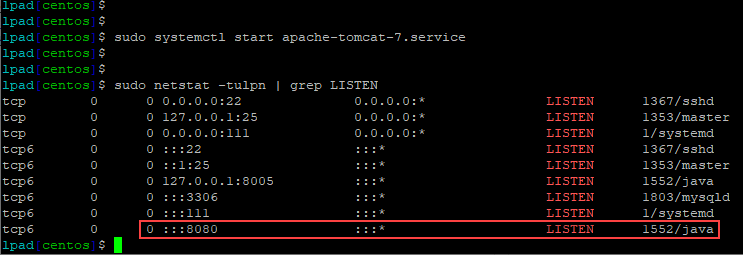
./startup.shWait for two minutes and use the following command to ensure Apache Tomcat is running on port 8080.
sudo netstat -tulpn | grep LISTENYou should see output similar to the following image showing that port 8080 is in use by Apache Tomcat.
Next
We’ll initialize the sample application.